| | Tech Tips - Business IT Support Tips
Posts Tagged ‘backup’
Monday, April 30th, 2012
Do you have a need to frequently access folders and files on a laptop or other computer that is not turned on 24/7? If this is you, you’ll know that you usually have to turn on the laptop and wait for it to boot to a state that allows you to access the data. This could be as quick as two minutes or as long as 10 minutes, depending on the age of your hardware. Even worse, if your battery is low and no ac power is available to plug in the laptop you may have to wait even longer.
You don’t have to wait anymore, there is a solution to your data accessibility problems! You can copy those folders and files to a usb memory stick and, not only will you be able to access to the data from another computer, you will also have a “live” backup just in case something ever happens. On a small memory stick with a small amount of data it is possible to perform the data copy operations and keep the data synchronized manually. As your data grows however, the process will eventually become difficult to manage in an effective way. Just the need to answer “Yes” or “No” to every overwrite dialog could make a regular copy operation turn into a nightmare.
Fortunately, Microsoft provides a free tools called SyncToy which will help minimize the time it takes to keep files in sync between folder pairs on your laptop and thumb drive. Download SyncToy here: http://www.microsoft.com/en-us/download/details.aspx?id=15155
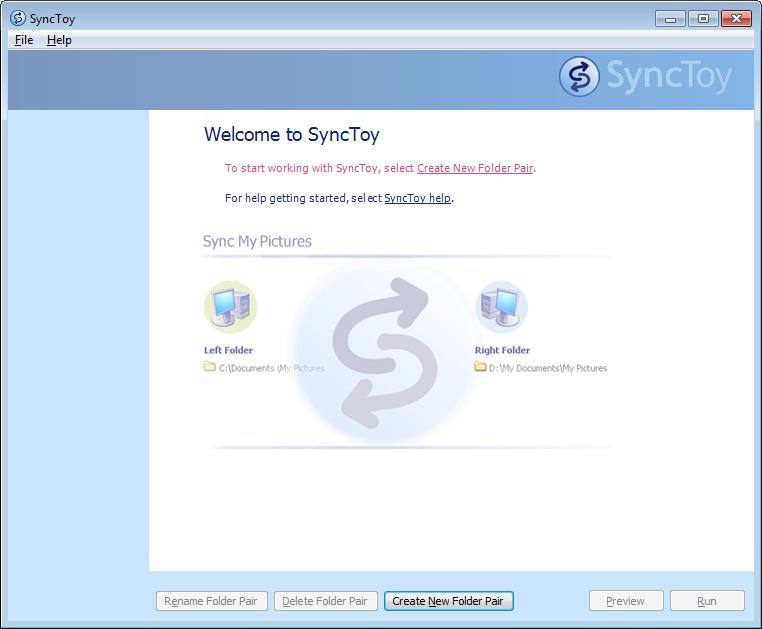
You will need the proper download based on your existing operating system, your choices are x64 or x32 bit versions. To find out what version you need, click Start, right click on the computer icon, and select Properties. Half way down the page you’ll see the “System” Header, now find “System Type” and look to see if your system requires 32-bit or 64-bit software. Download and install SyncToy then run it, which will bring up the following screen:
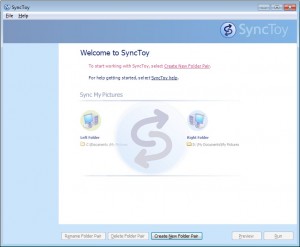
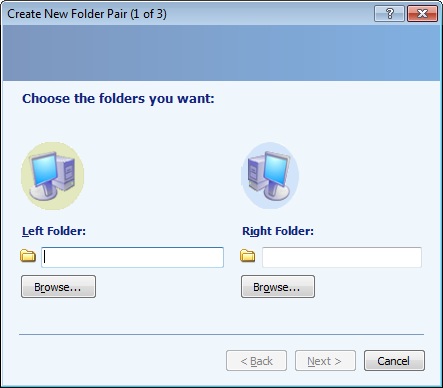
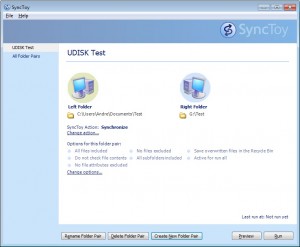
To begin, you need to create a folder pair. This pair is how SyncToy manages keeping your files syncronized between the left and right folders. When you click on the Create Folder Pair button you start the process of joining the folder pairs. It is easiest if you browse to the location for each pair:

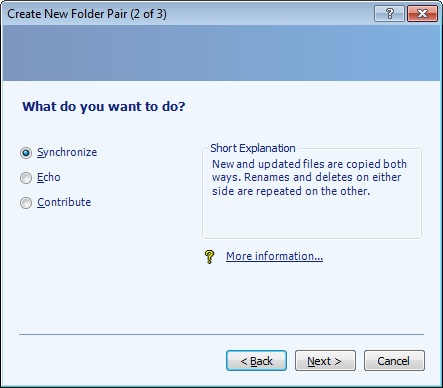
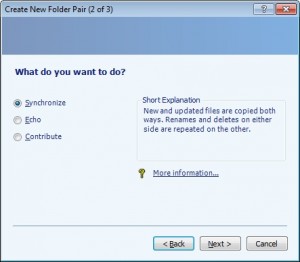
For this example we will use a “Test” folder with the “left” folder on the local hard drive and the “right” folder on a thumb drive. If a folder does not exist on the right folder destination, SyncToy allows you to create the folder as needed. Once you have folders set, you will be given a choice to Synchronize, Echo, or Contribute. For most applications you should Synchronize. You should carfully consider each option to get the best result. Here are the definitions of the options.
Synchronize: New and updated files are copied both ways. Renames and deletes on either side are repeated on the other.
Echo: New and updated files are copied left to right. Renames and deletes on the left are repeated on the right.
Contribute: New and updated files are copied left to right. Renames on the left are repeated on the right. No deletions.
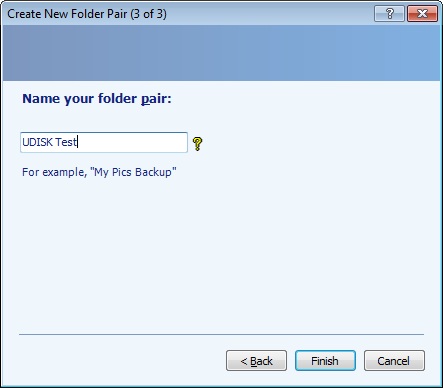
 Choose your Sync Now name your pair. This should be a simple name, yet descriptive of the pair.
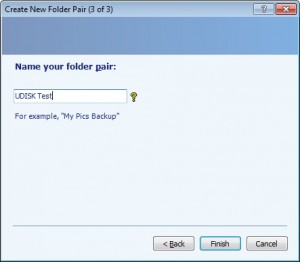 Name your pair That is all there is to creating folder pairs:
 The First Pair The simpler you keep your pairs, the easier it will be to maintain them. Now you simply need to run the pair(s) as needed, or put them on a schedule, but that is a topic for a future blog post.
my PC Techs provides expert computer consultants to your Arizona business. Let us help your business save money and increase productivity. Call today (602) 456-0150 for a free consultation.
Tags: 32, 64, accessibility, backup, bit, browser, computer, contribute, copy, create folder pair, data, deletes, echo, files, folder pair, folder pairs, folders, laptop, left, memory stick, microsoft, overwrite, rename, renames, repeated, right, synchronize, synctoy, thumb drive, tool
Posted in Tech Club General | No Comments »
Saturday, November 26th, 2011
A hard drive is a small box inside of computer equipment that may contain sensitive information such as usernames, passwords, credit card information, social security numbers, etc. If you are upgrading to a new computer (desktop computer, laptop, office copier, etc.) always remove and destroy the hard drive before selling, donating, or recycling any computer equipment! Failure to destroy the hard drive before giving the computer away could result in sensitive information ending up in the hands of the new owner, who will then be able to copy old files and go through your personal information stored there.
There are many options available if you are looking to dispose of an old hard drive. Some professional destruction methods include:
- Shredding it using a local shredding company
- Taking it to a computer recycling company
- Mailing it to a hard drive destruction specialist
- Bringing it in to a local computer shop that will dispose of it
These methods are ideal, but they usually cost money. Professional destruction of a hard drive could cost $70 or more in some areas! So what is a low cost method to dispose of the hard drive and keep your personal data safe if you are low on funds? Considering you have all the right tools, this method won’t cost you a dime and is a very secure way to get rid of a hard drive while keeping your data secure.
Step 1: Wipe it! Wiping a hard drive in essence destroys the data by writing over it with random characters. There are many free utilities to help, a good one is Active@ KillDisk. You can download the free utility from their website, click: Active@ KillDisk. This free software overwrites all of the data on your old hard drive with random characters and WILL DESTROY ALL OF YOUR DATA! Be sure you have performed a complete backup and have transferred the data from your old hard drive to your new system before wiping it.
Step 2: Remove it! Physically remove the hard drive from the system. This is usually the easy part, you’ll just need a screwdriver and a little patience. Keep in mind that you will still be able to sell or donate the old computer without a hard drive missing, just be sure to let the new owners know in advance that they will need a new hard drive and operating system.
Step 3: Drill it! If you plan on using the old hard drive again, skip this step. Otherwise it’s best to physically destroy the old hard drive just to be 100% certain that the old data is completely destroyed. This step is not only fun, depending on how much personal data you had on the old drive it can also help you sleep better at night.
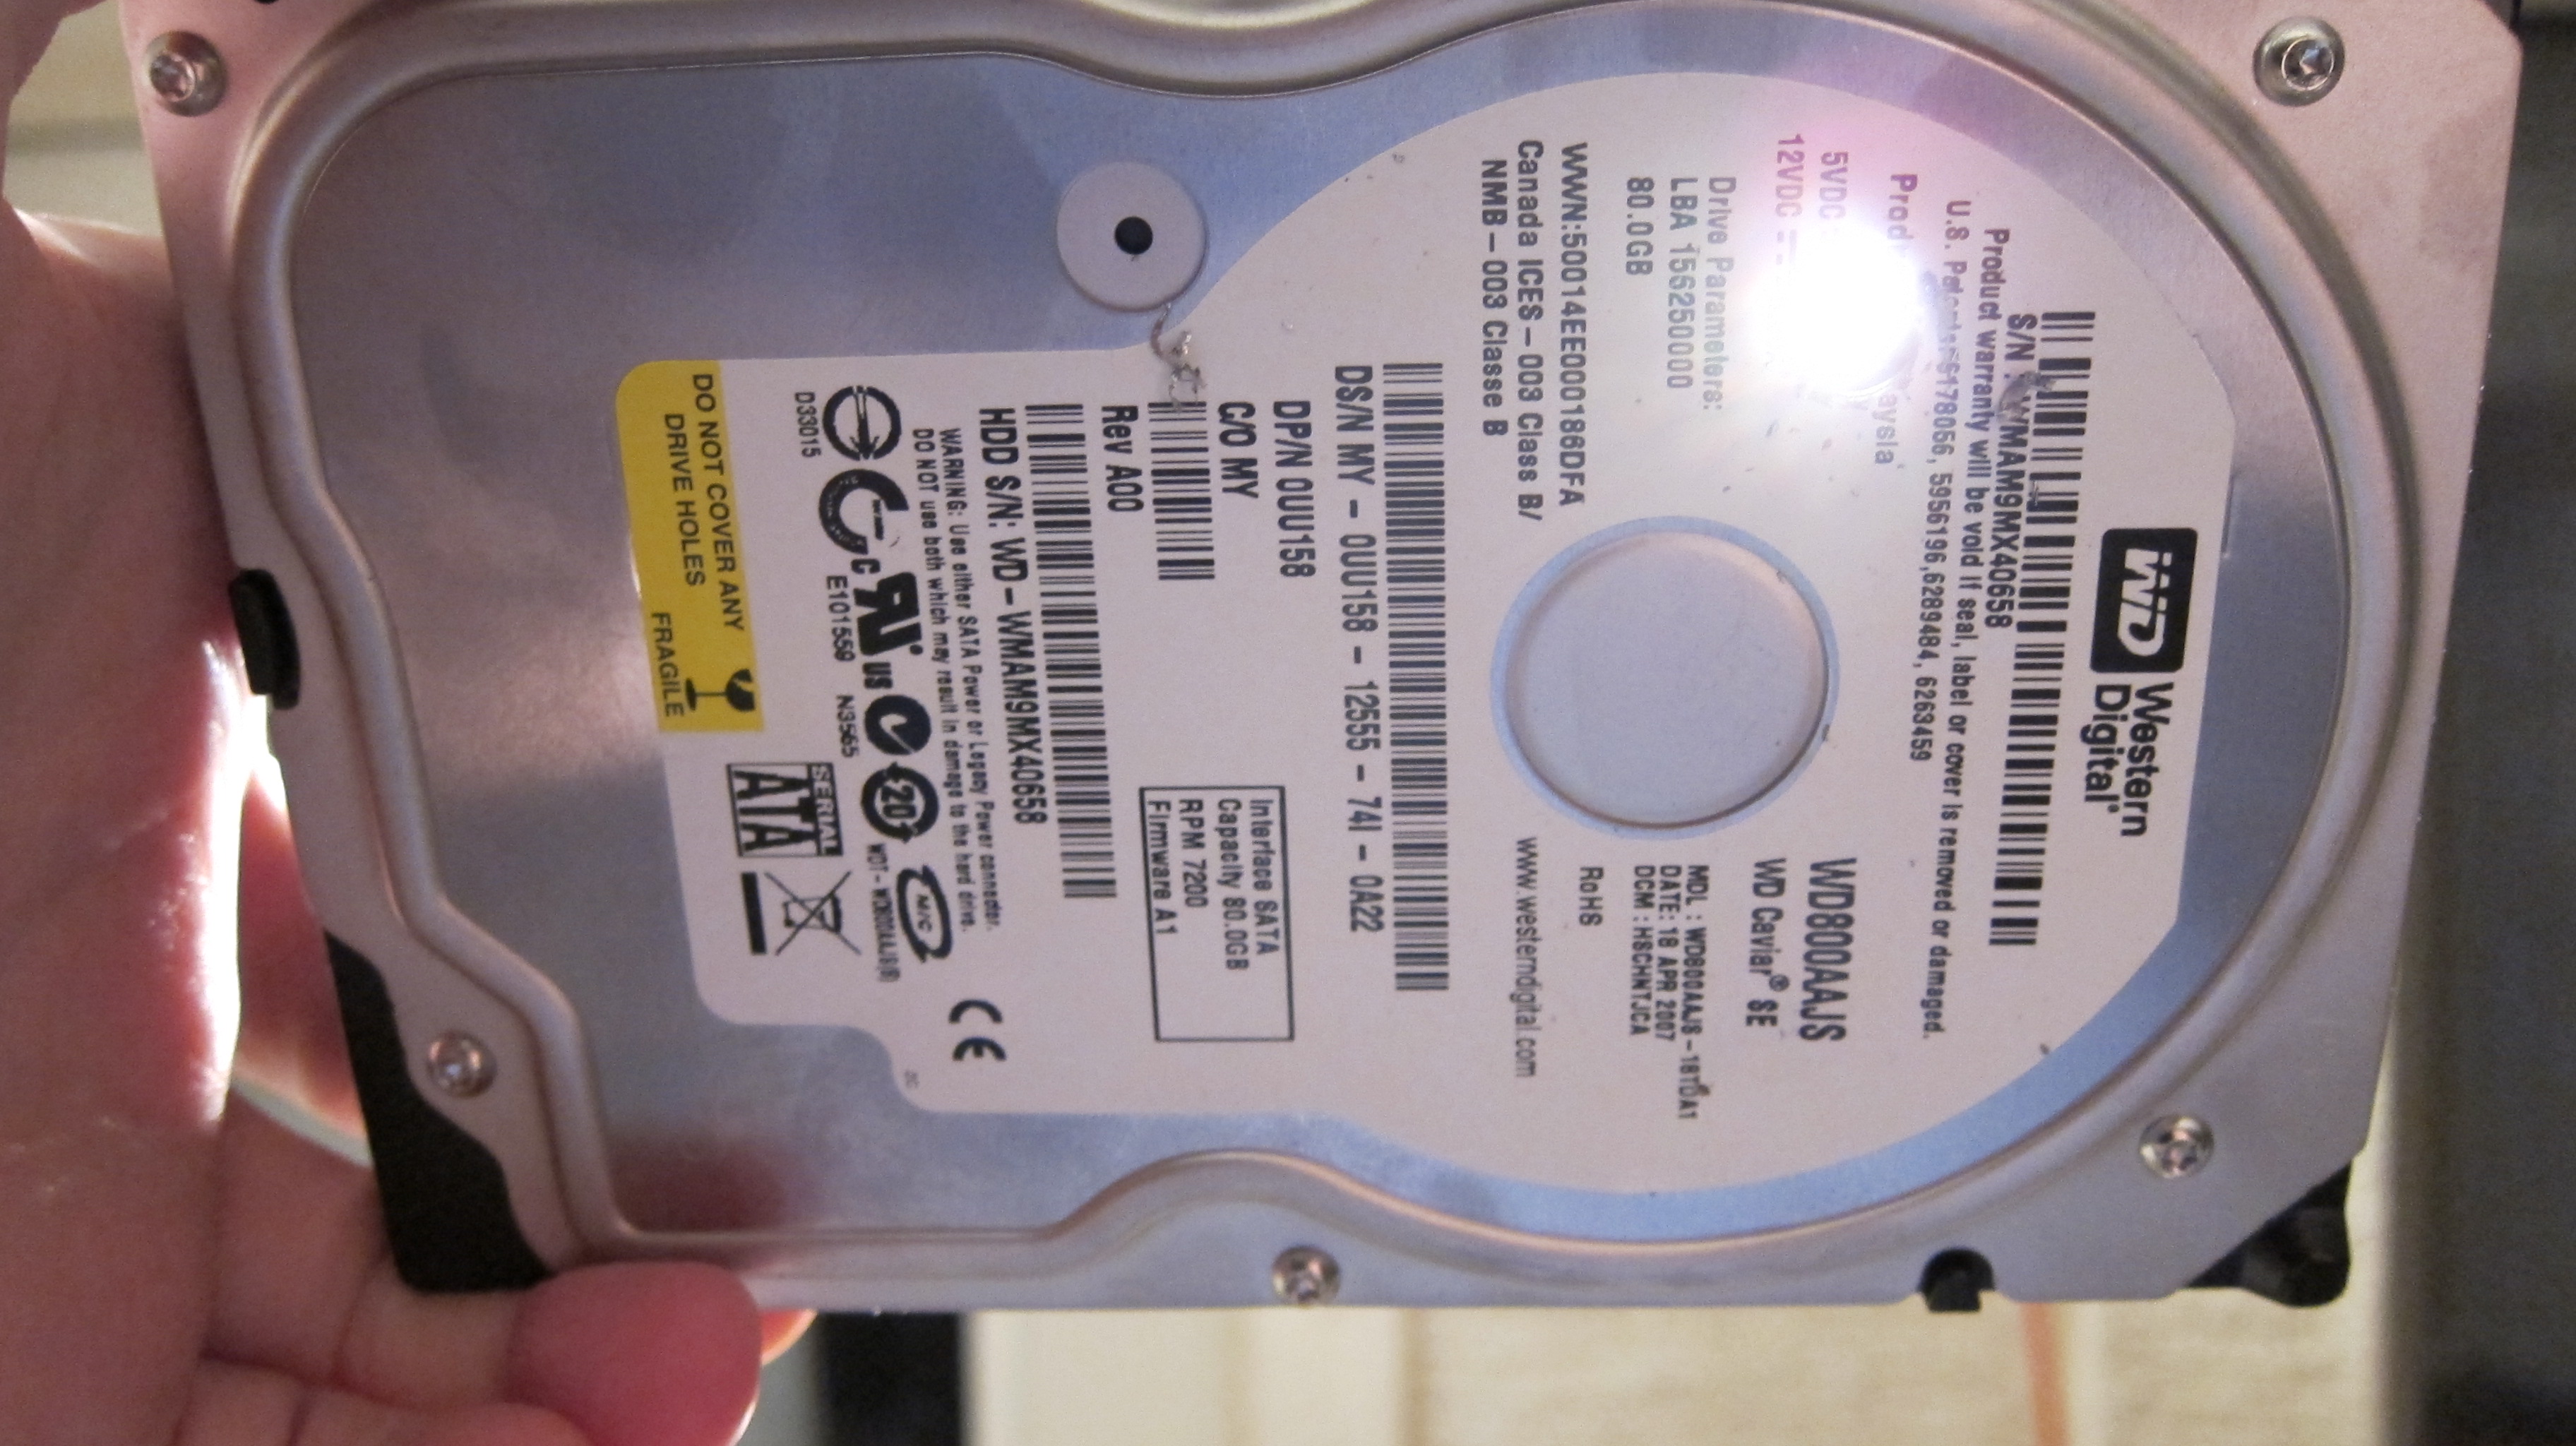
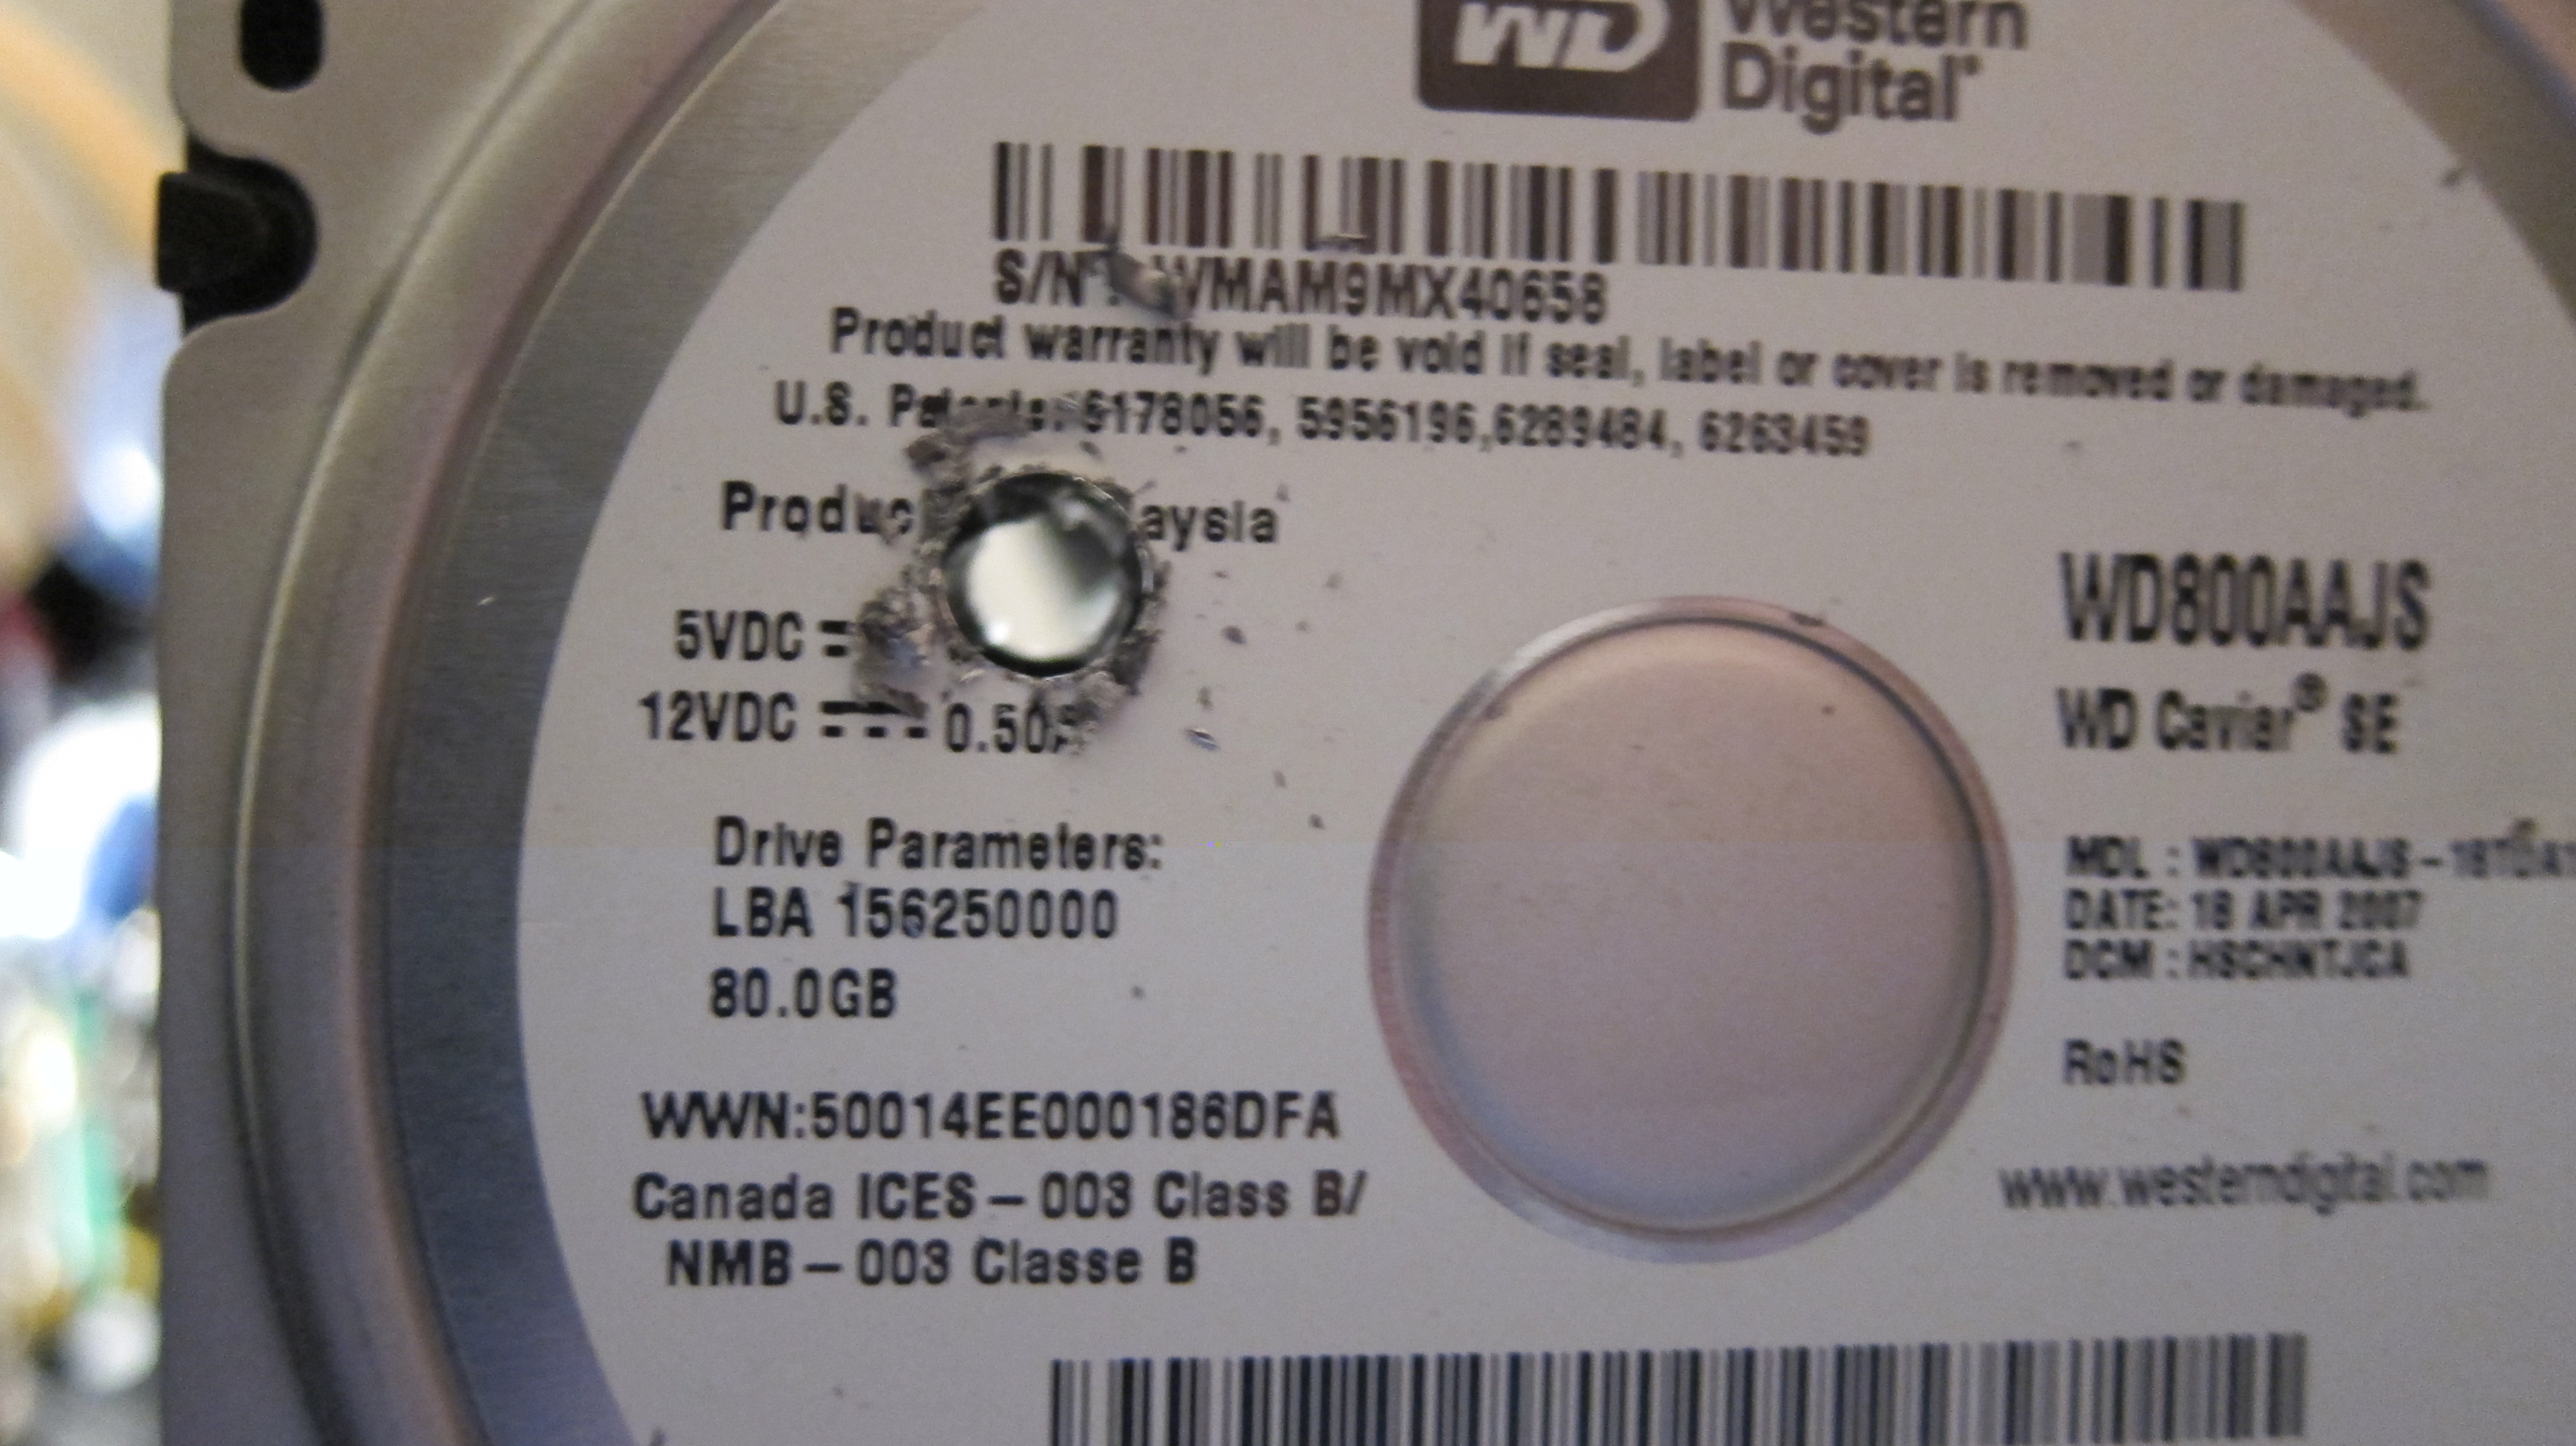
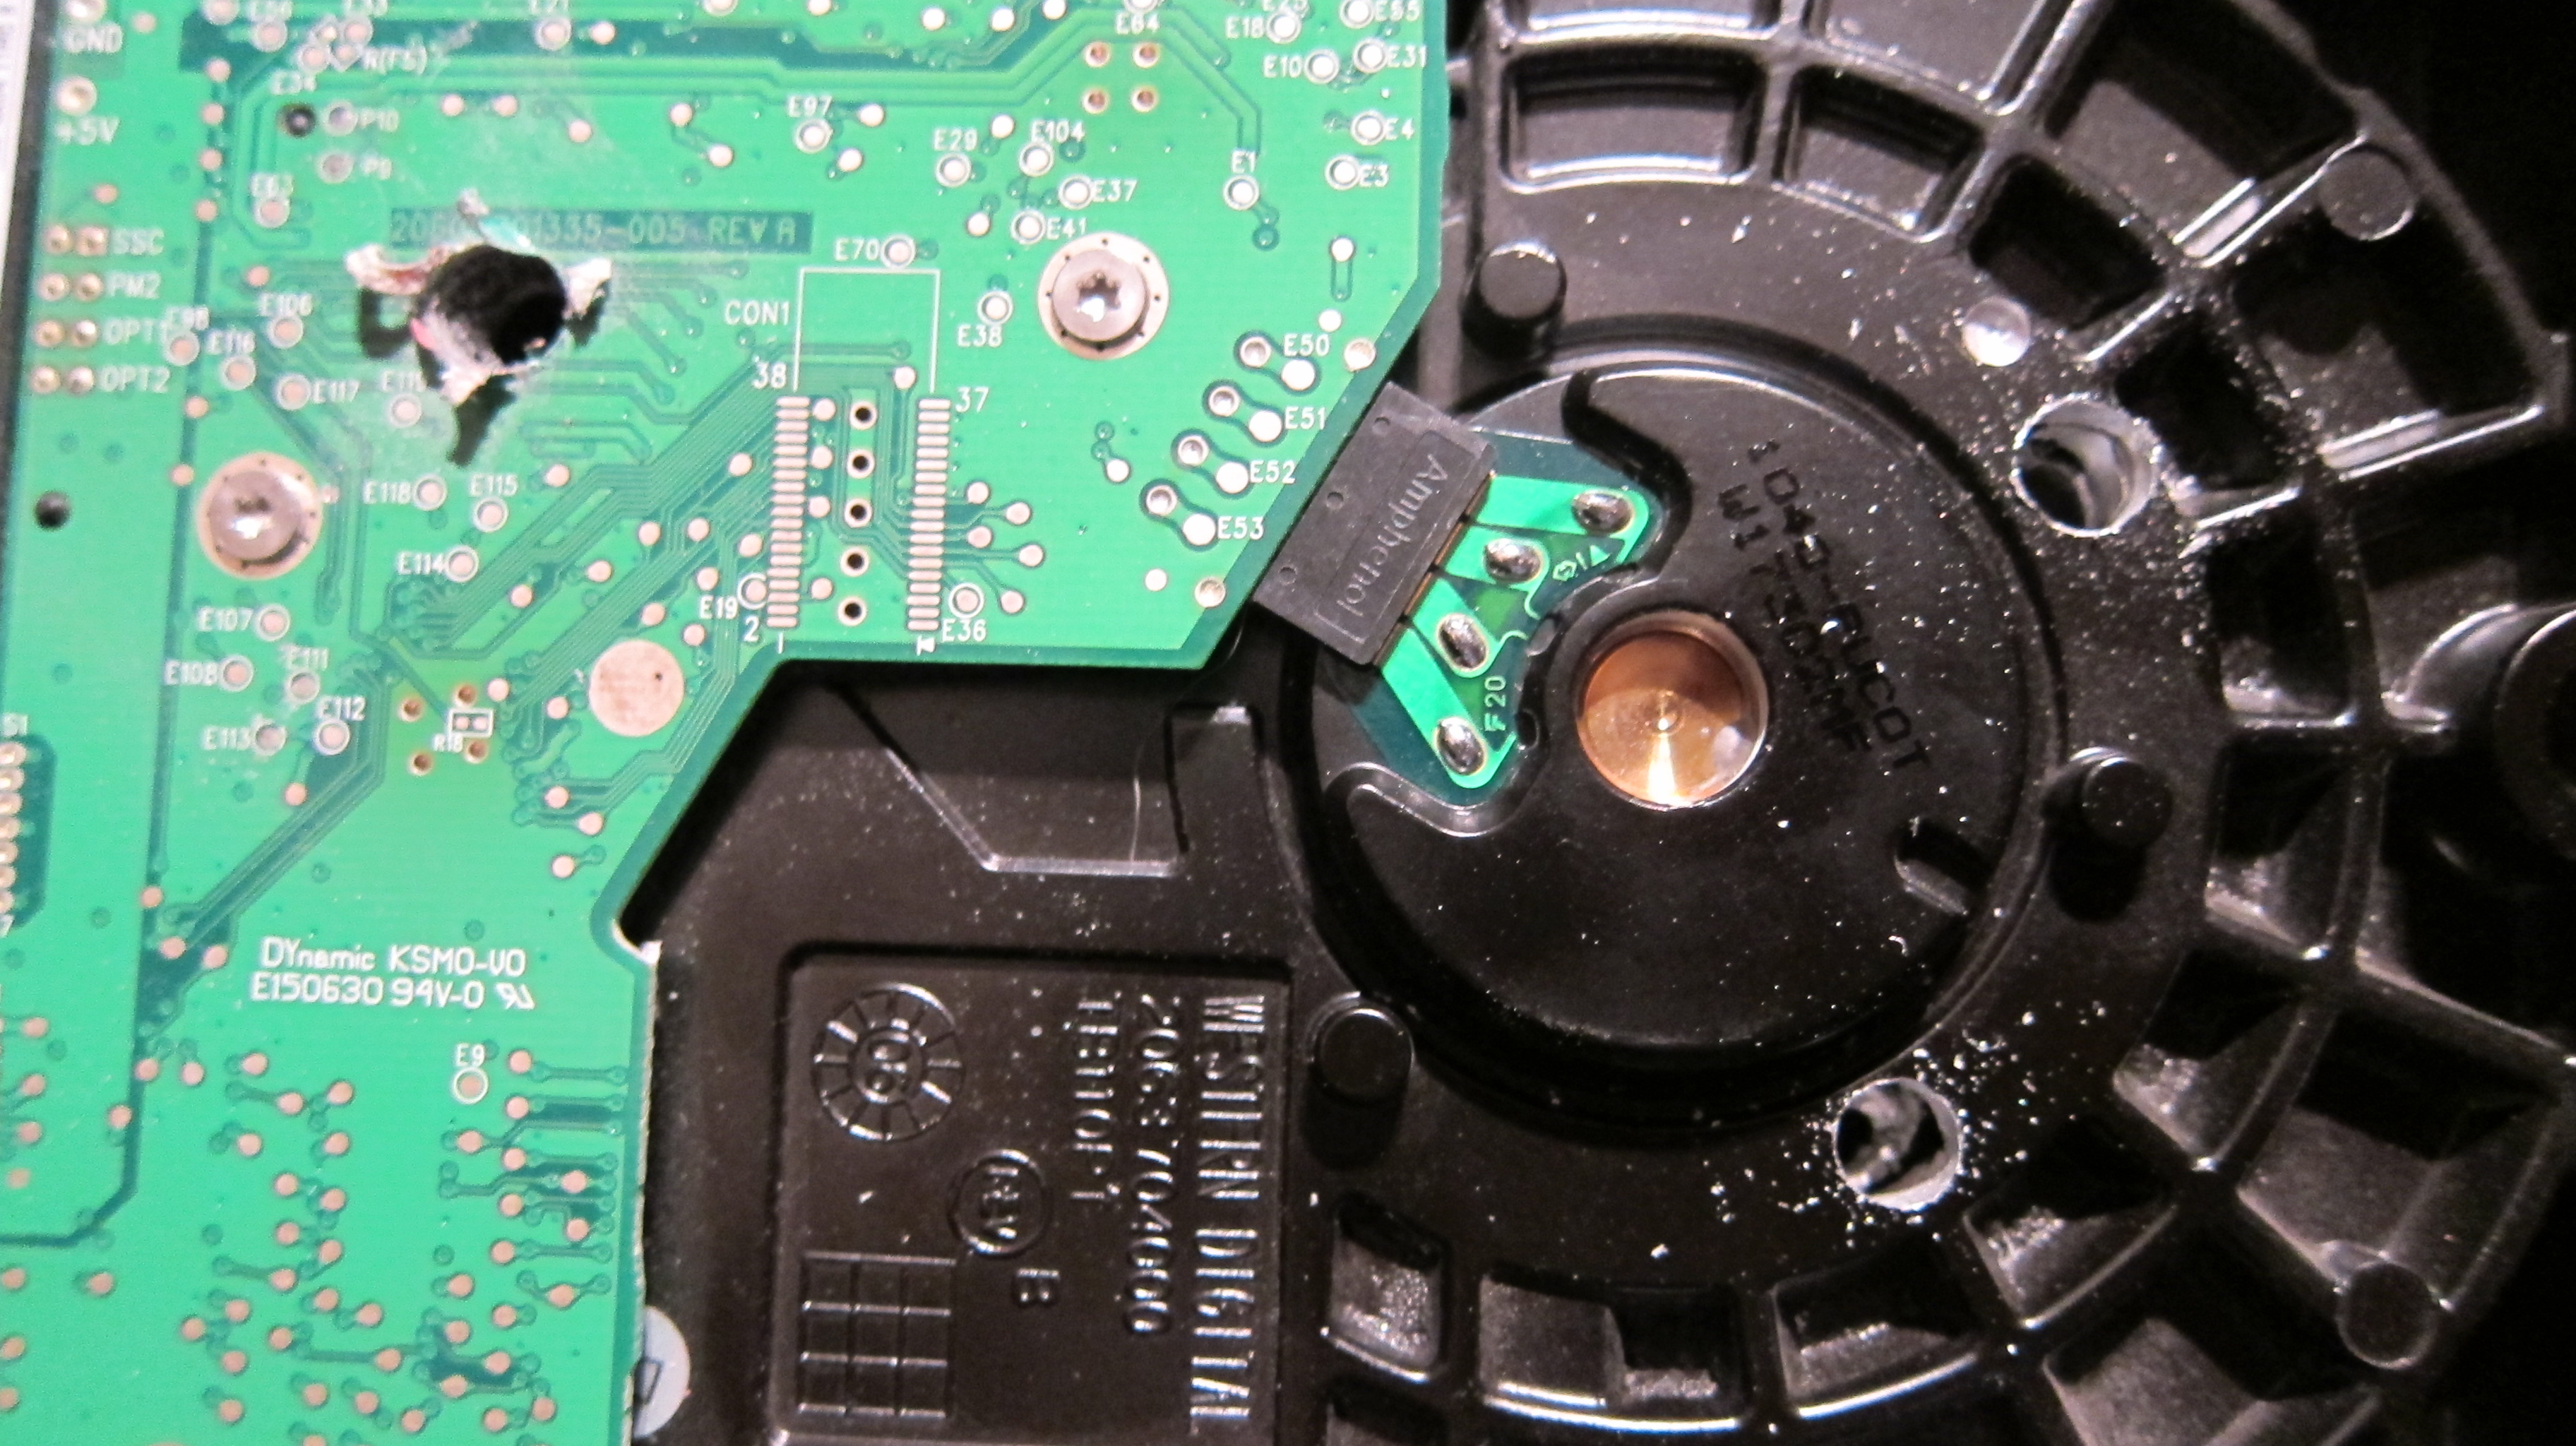
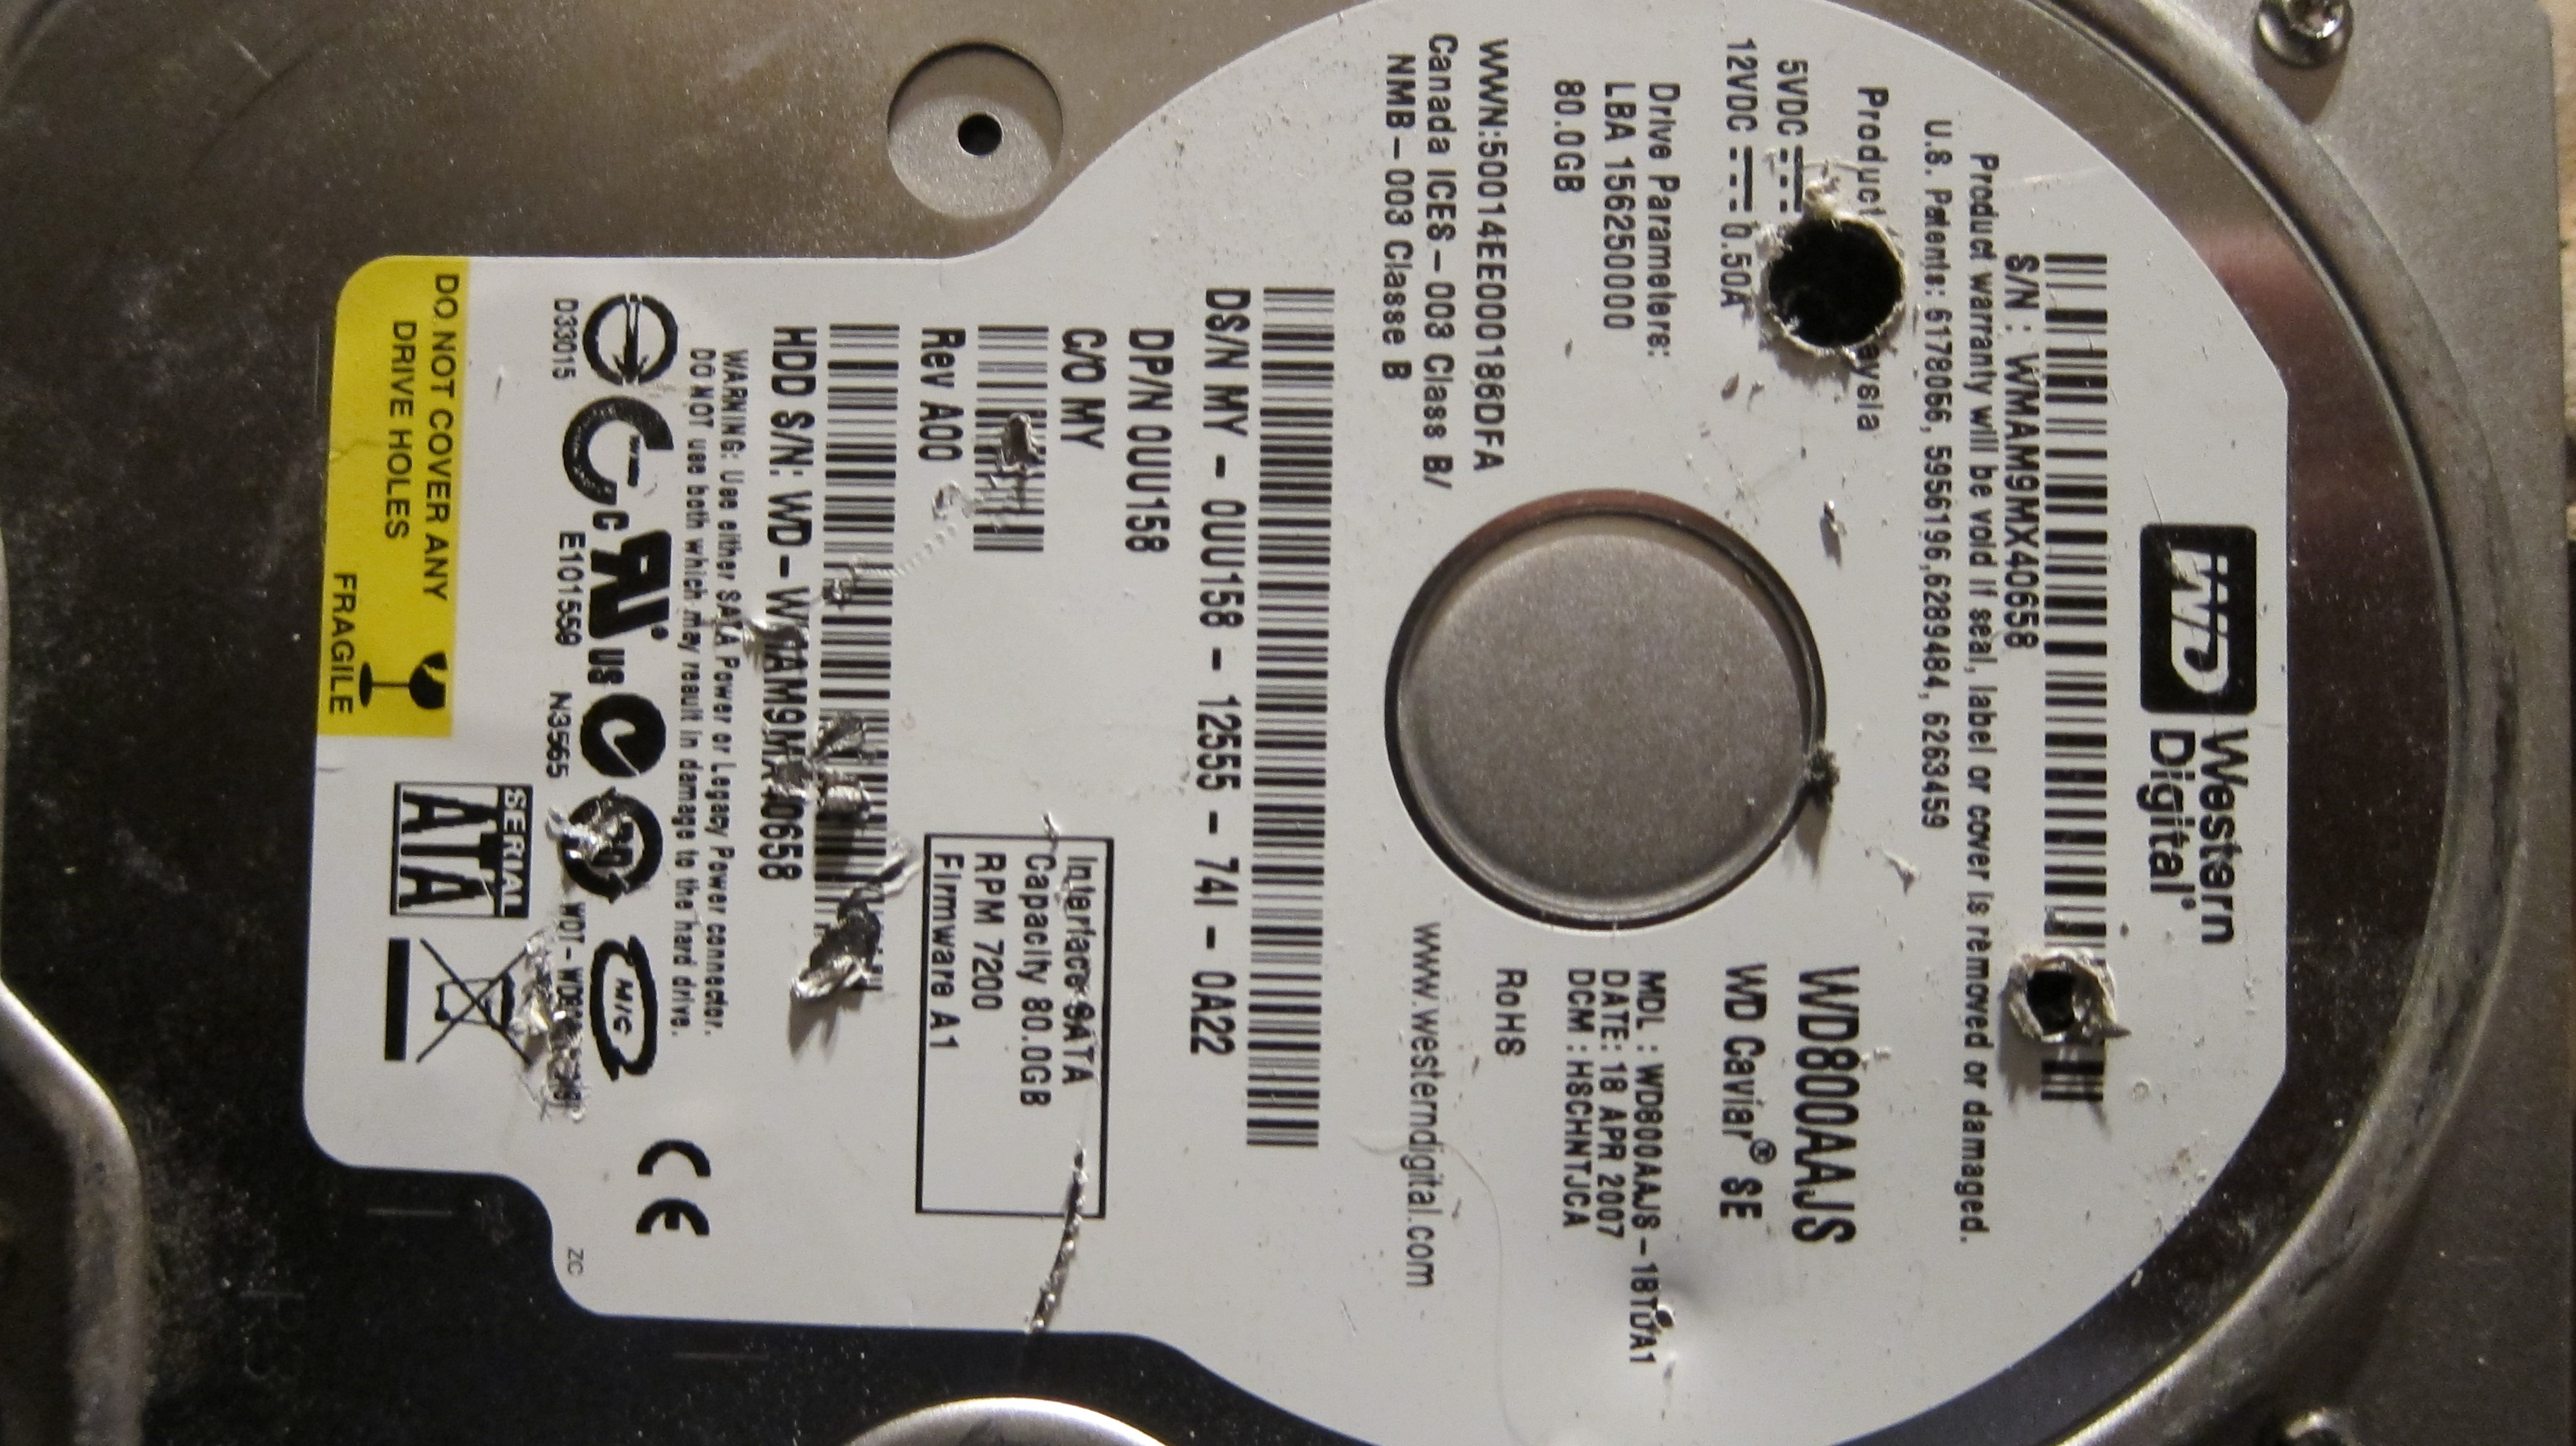
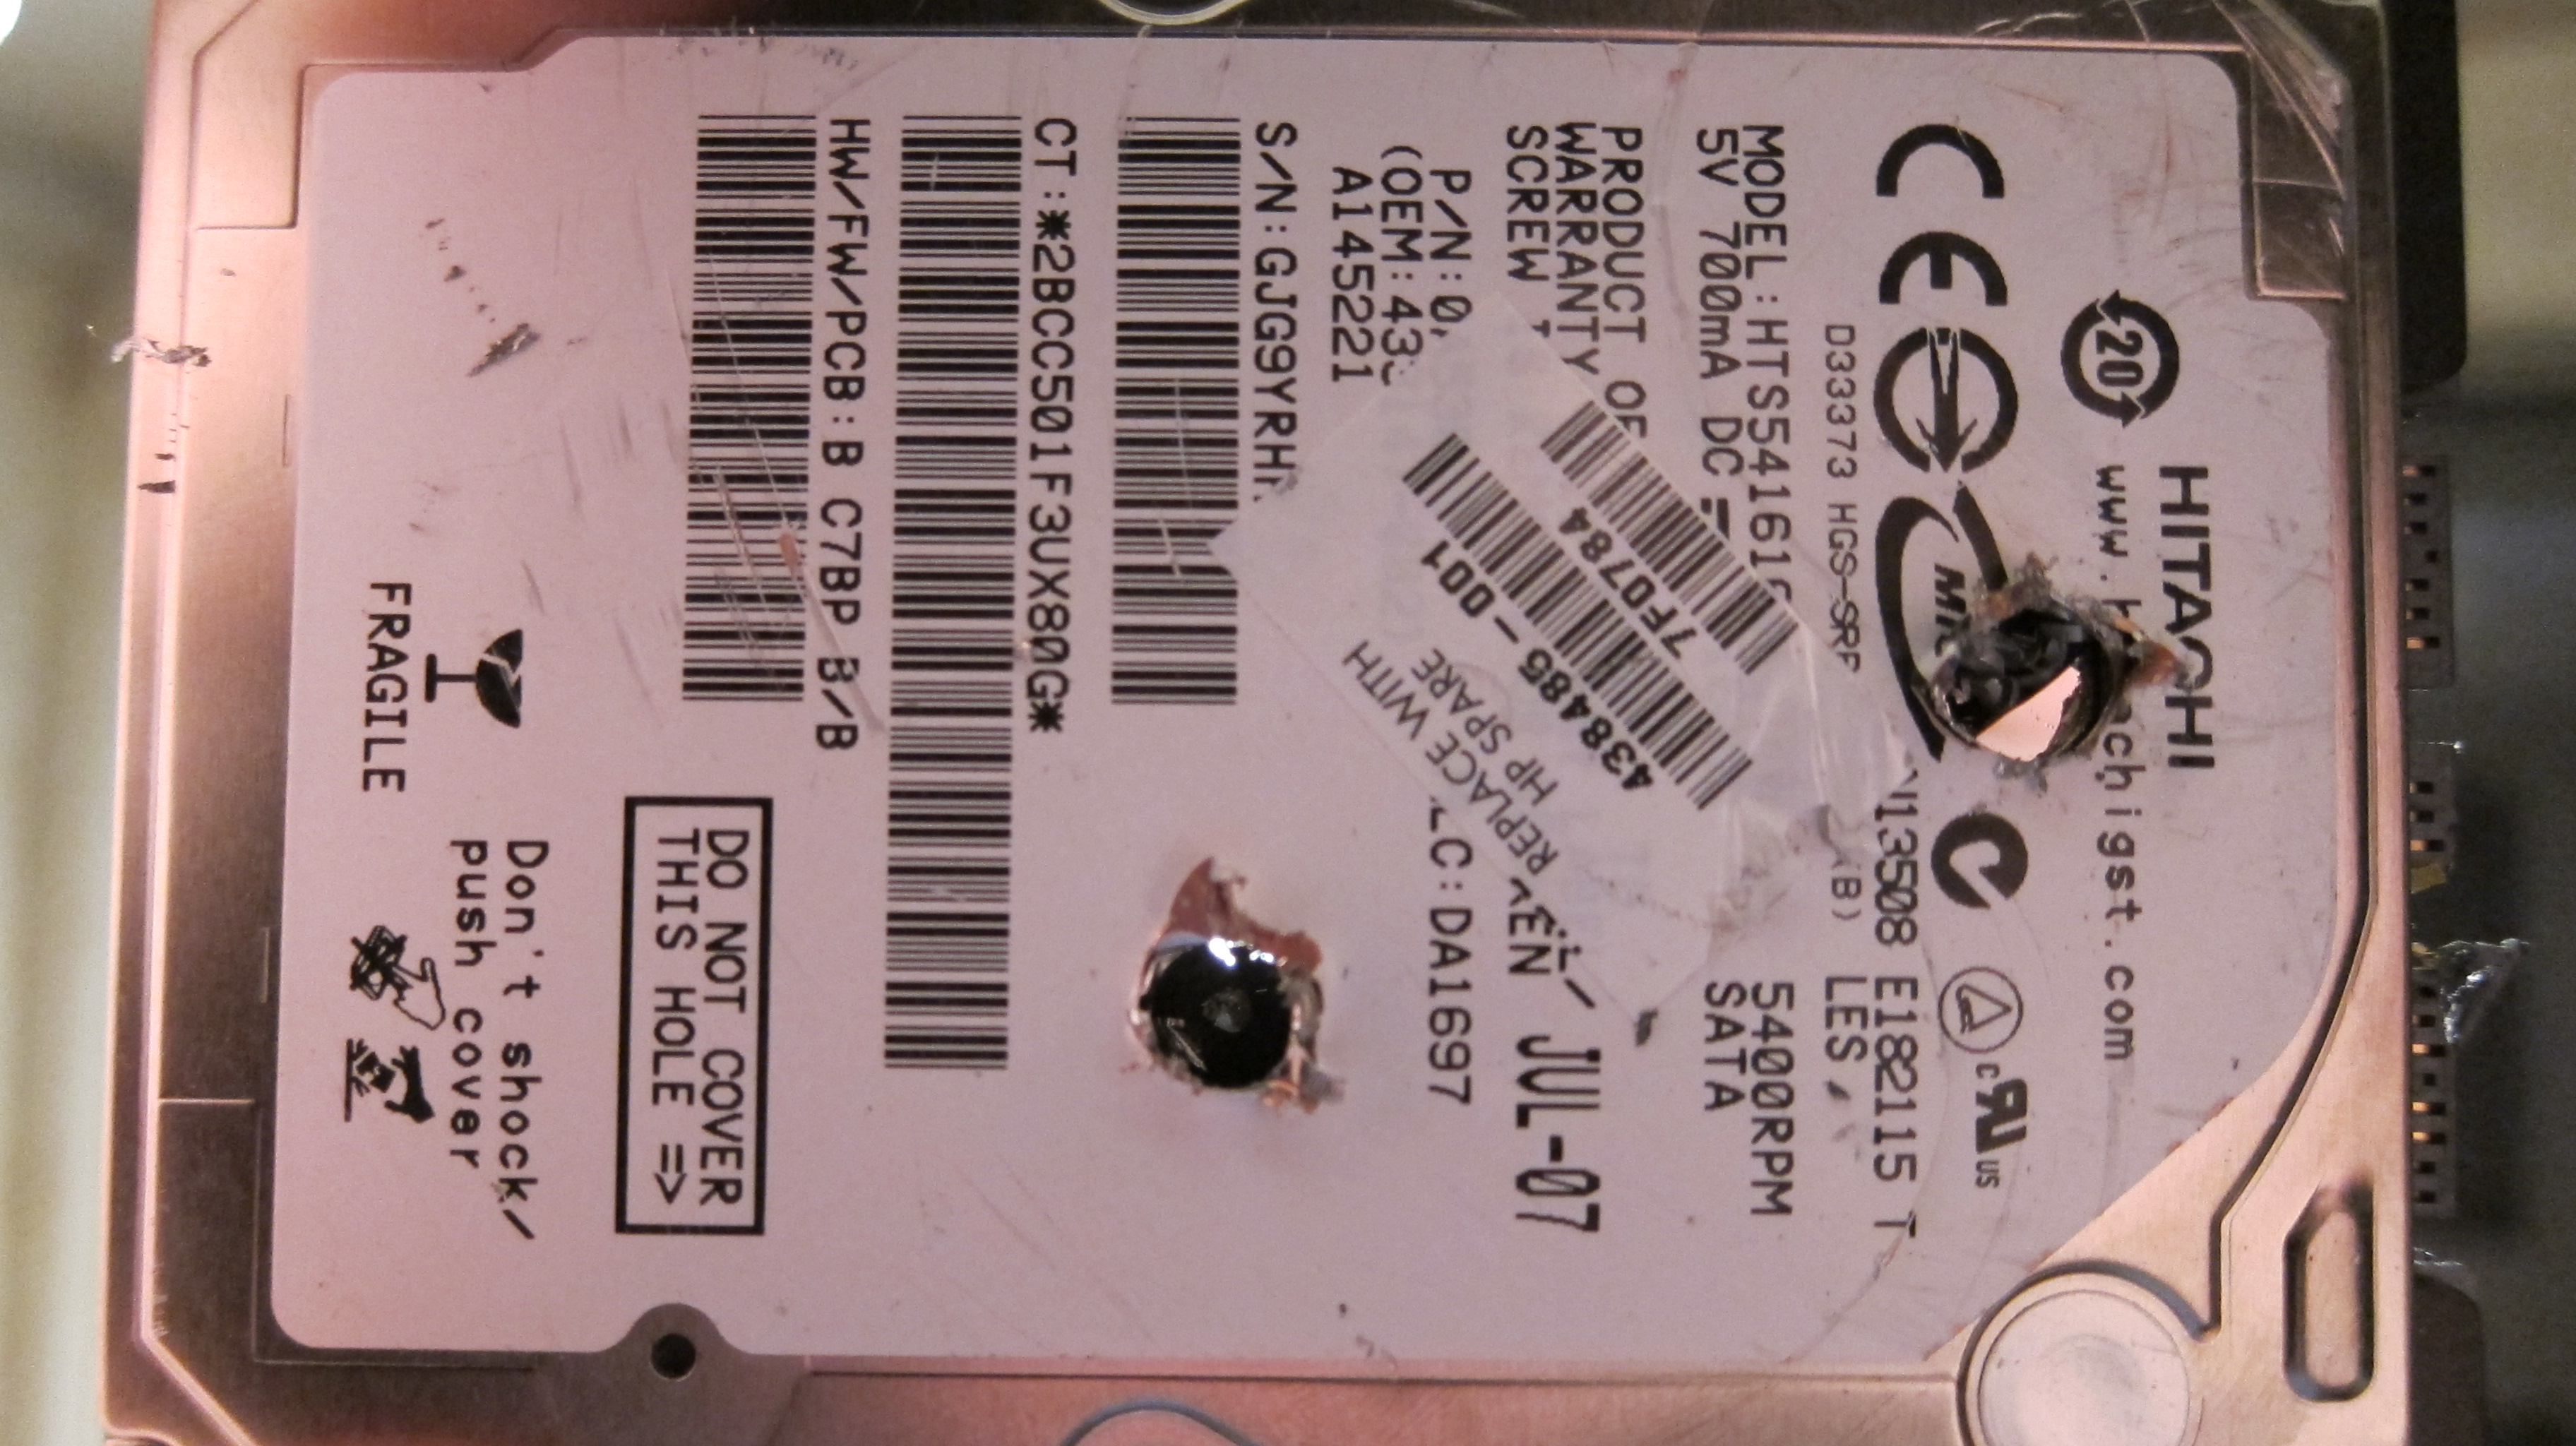
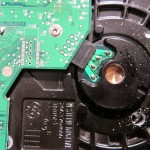
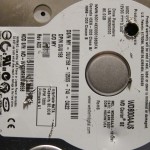
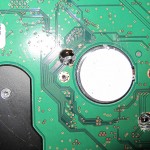
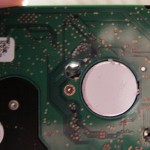
Wearing protective goggles, gloves, and a dust mask for your mouth and nose take a drill and a metal drill bit to the drive. You’ll want to drill through the drive completely from one side to the other, and you’ll want to do this multiple times. Two important areas for you to drill through are the platters and the controller board. See examples in the below images.
-
-
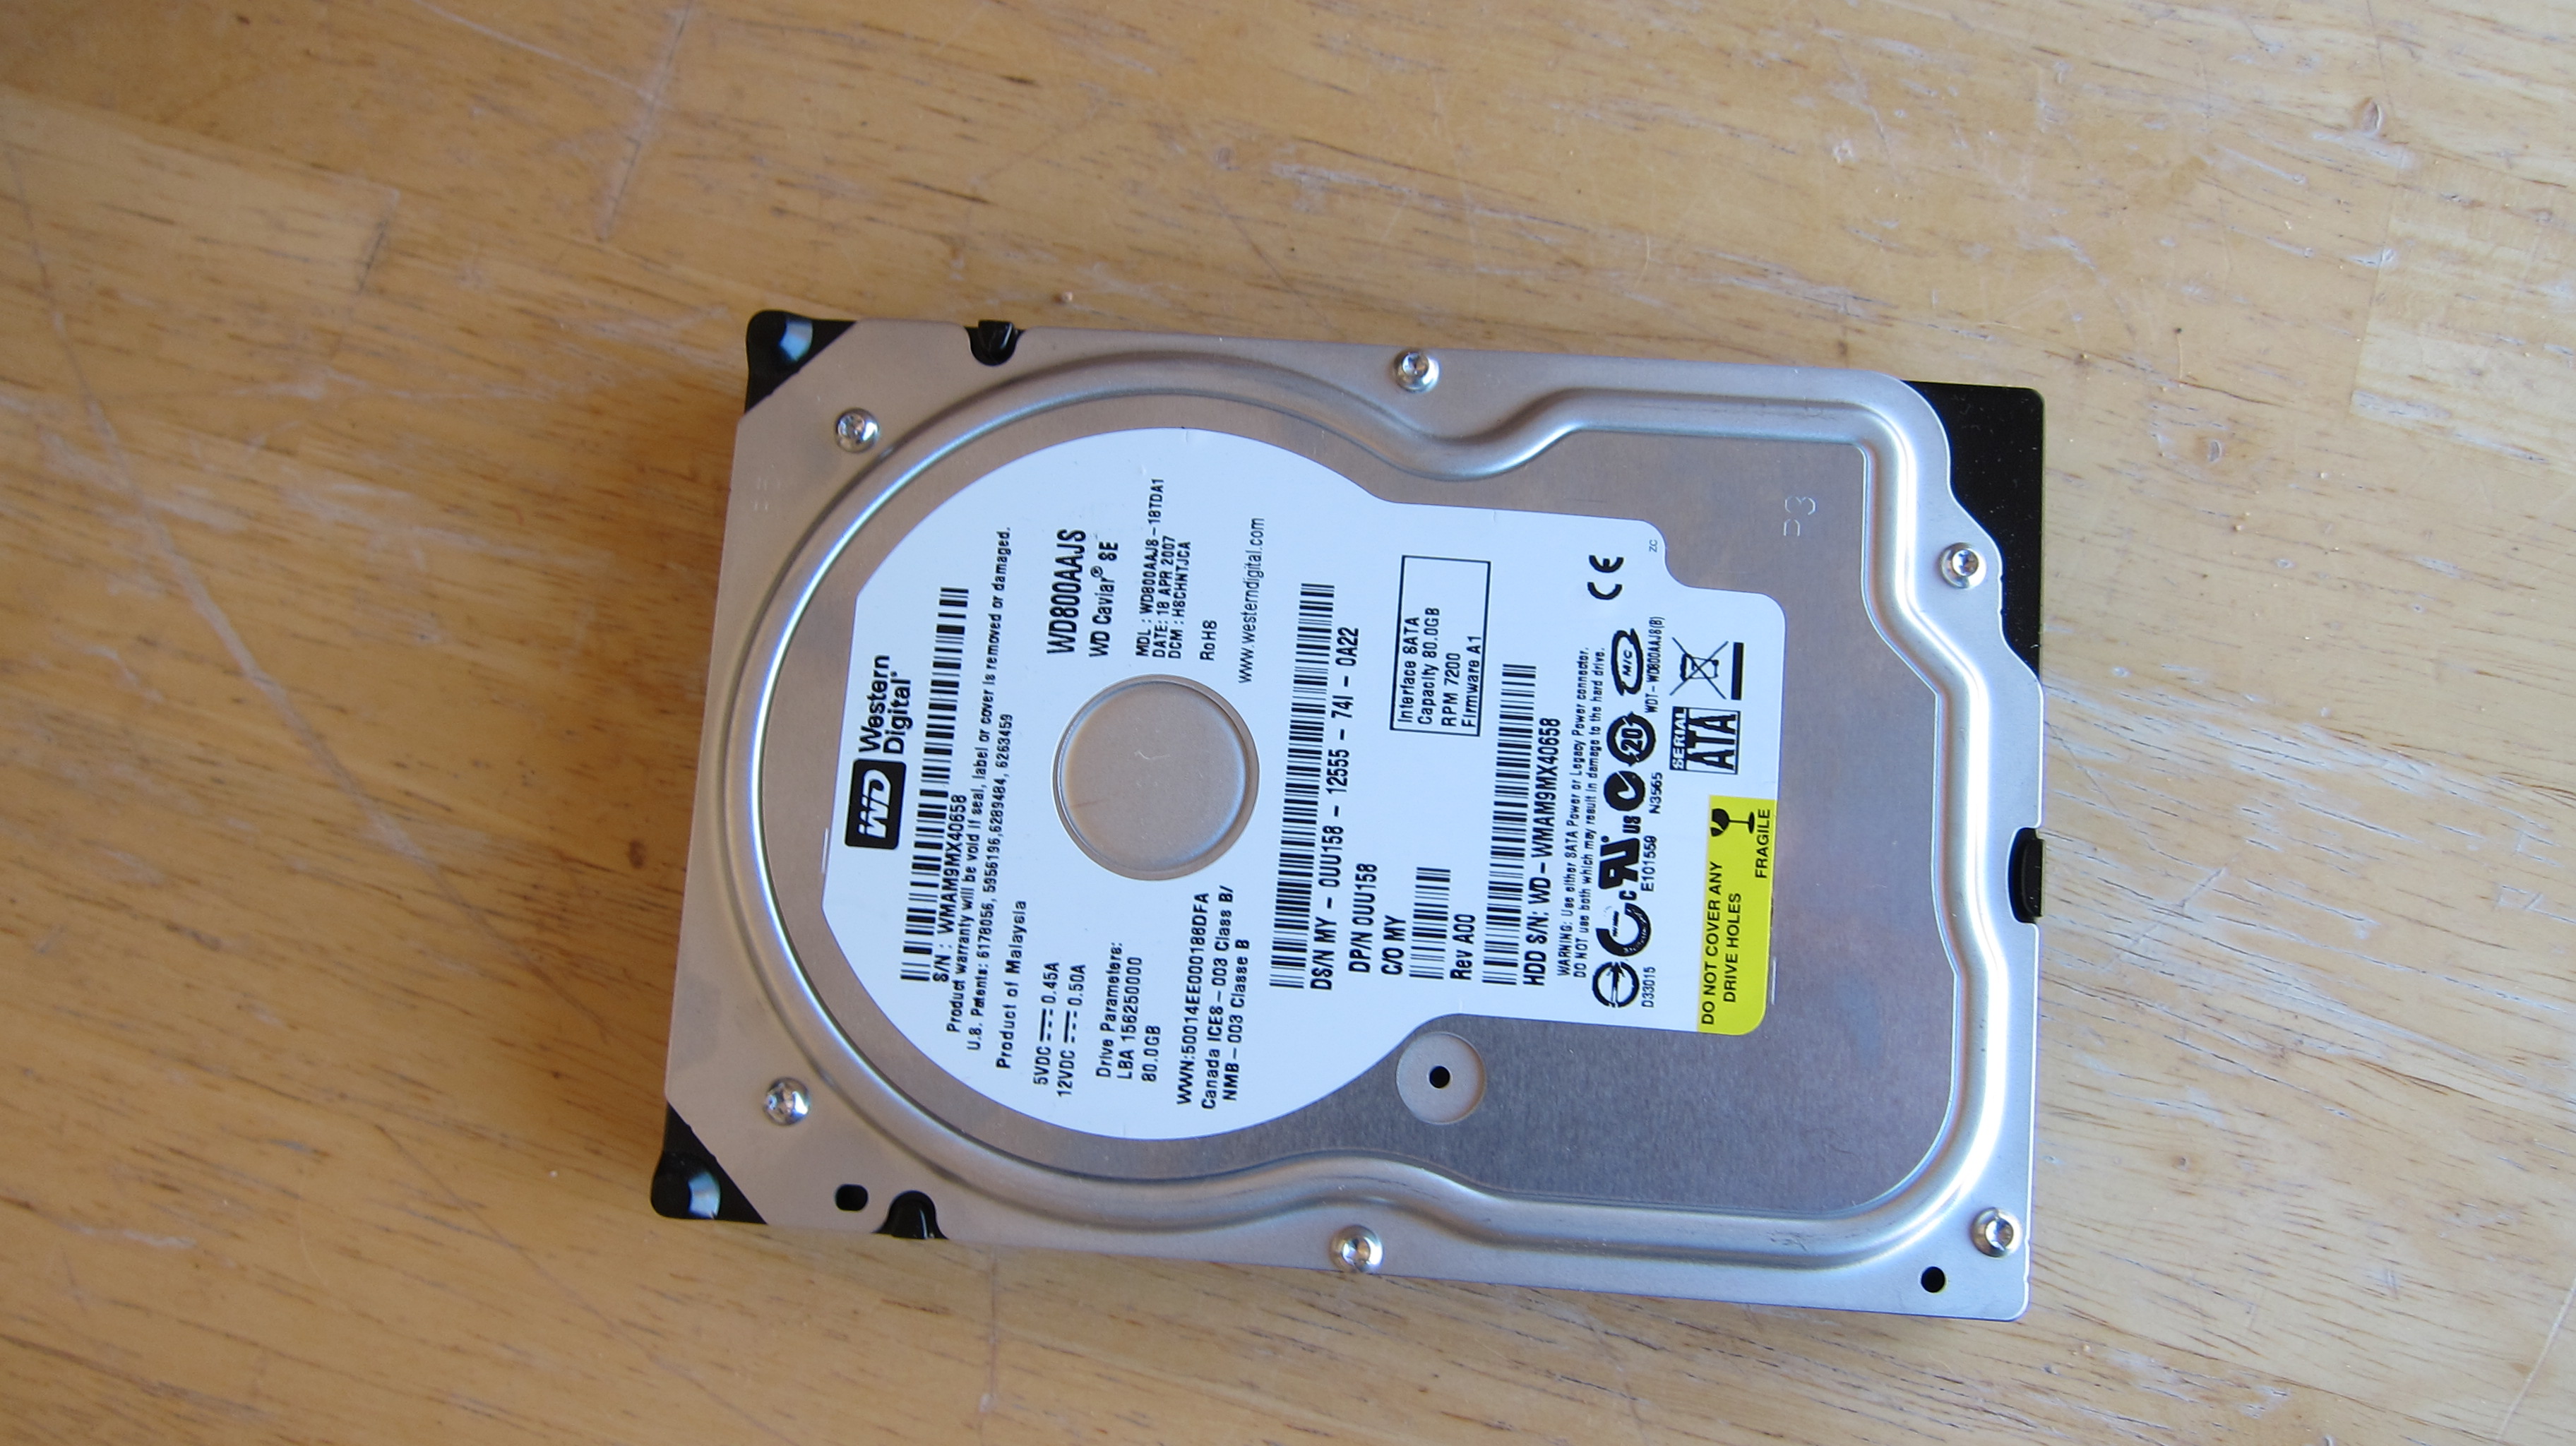
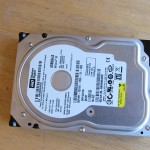
Hard drive from an old computer, data already moved to new computer and ready for destruction.
-

-
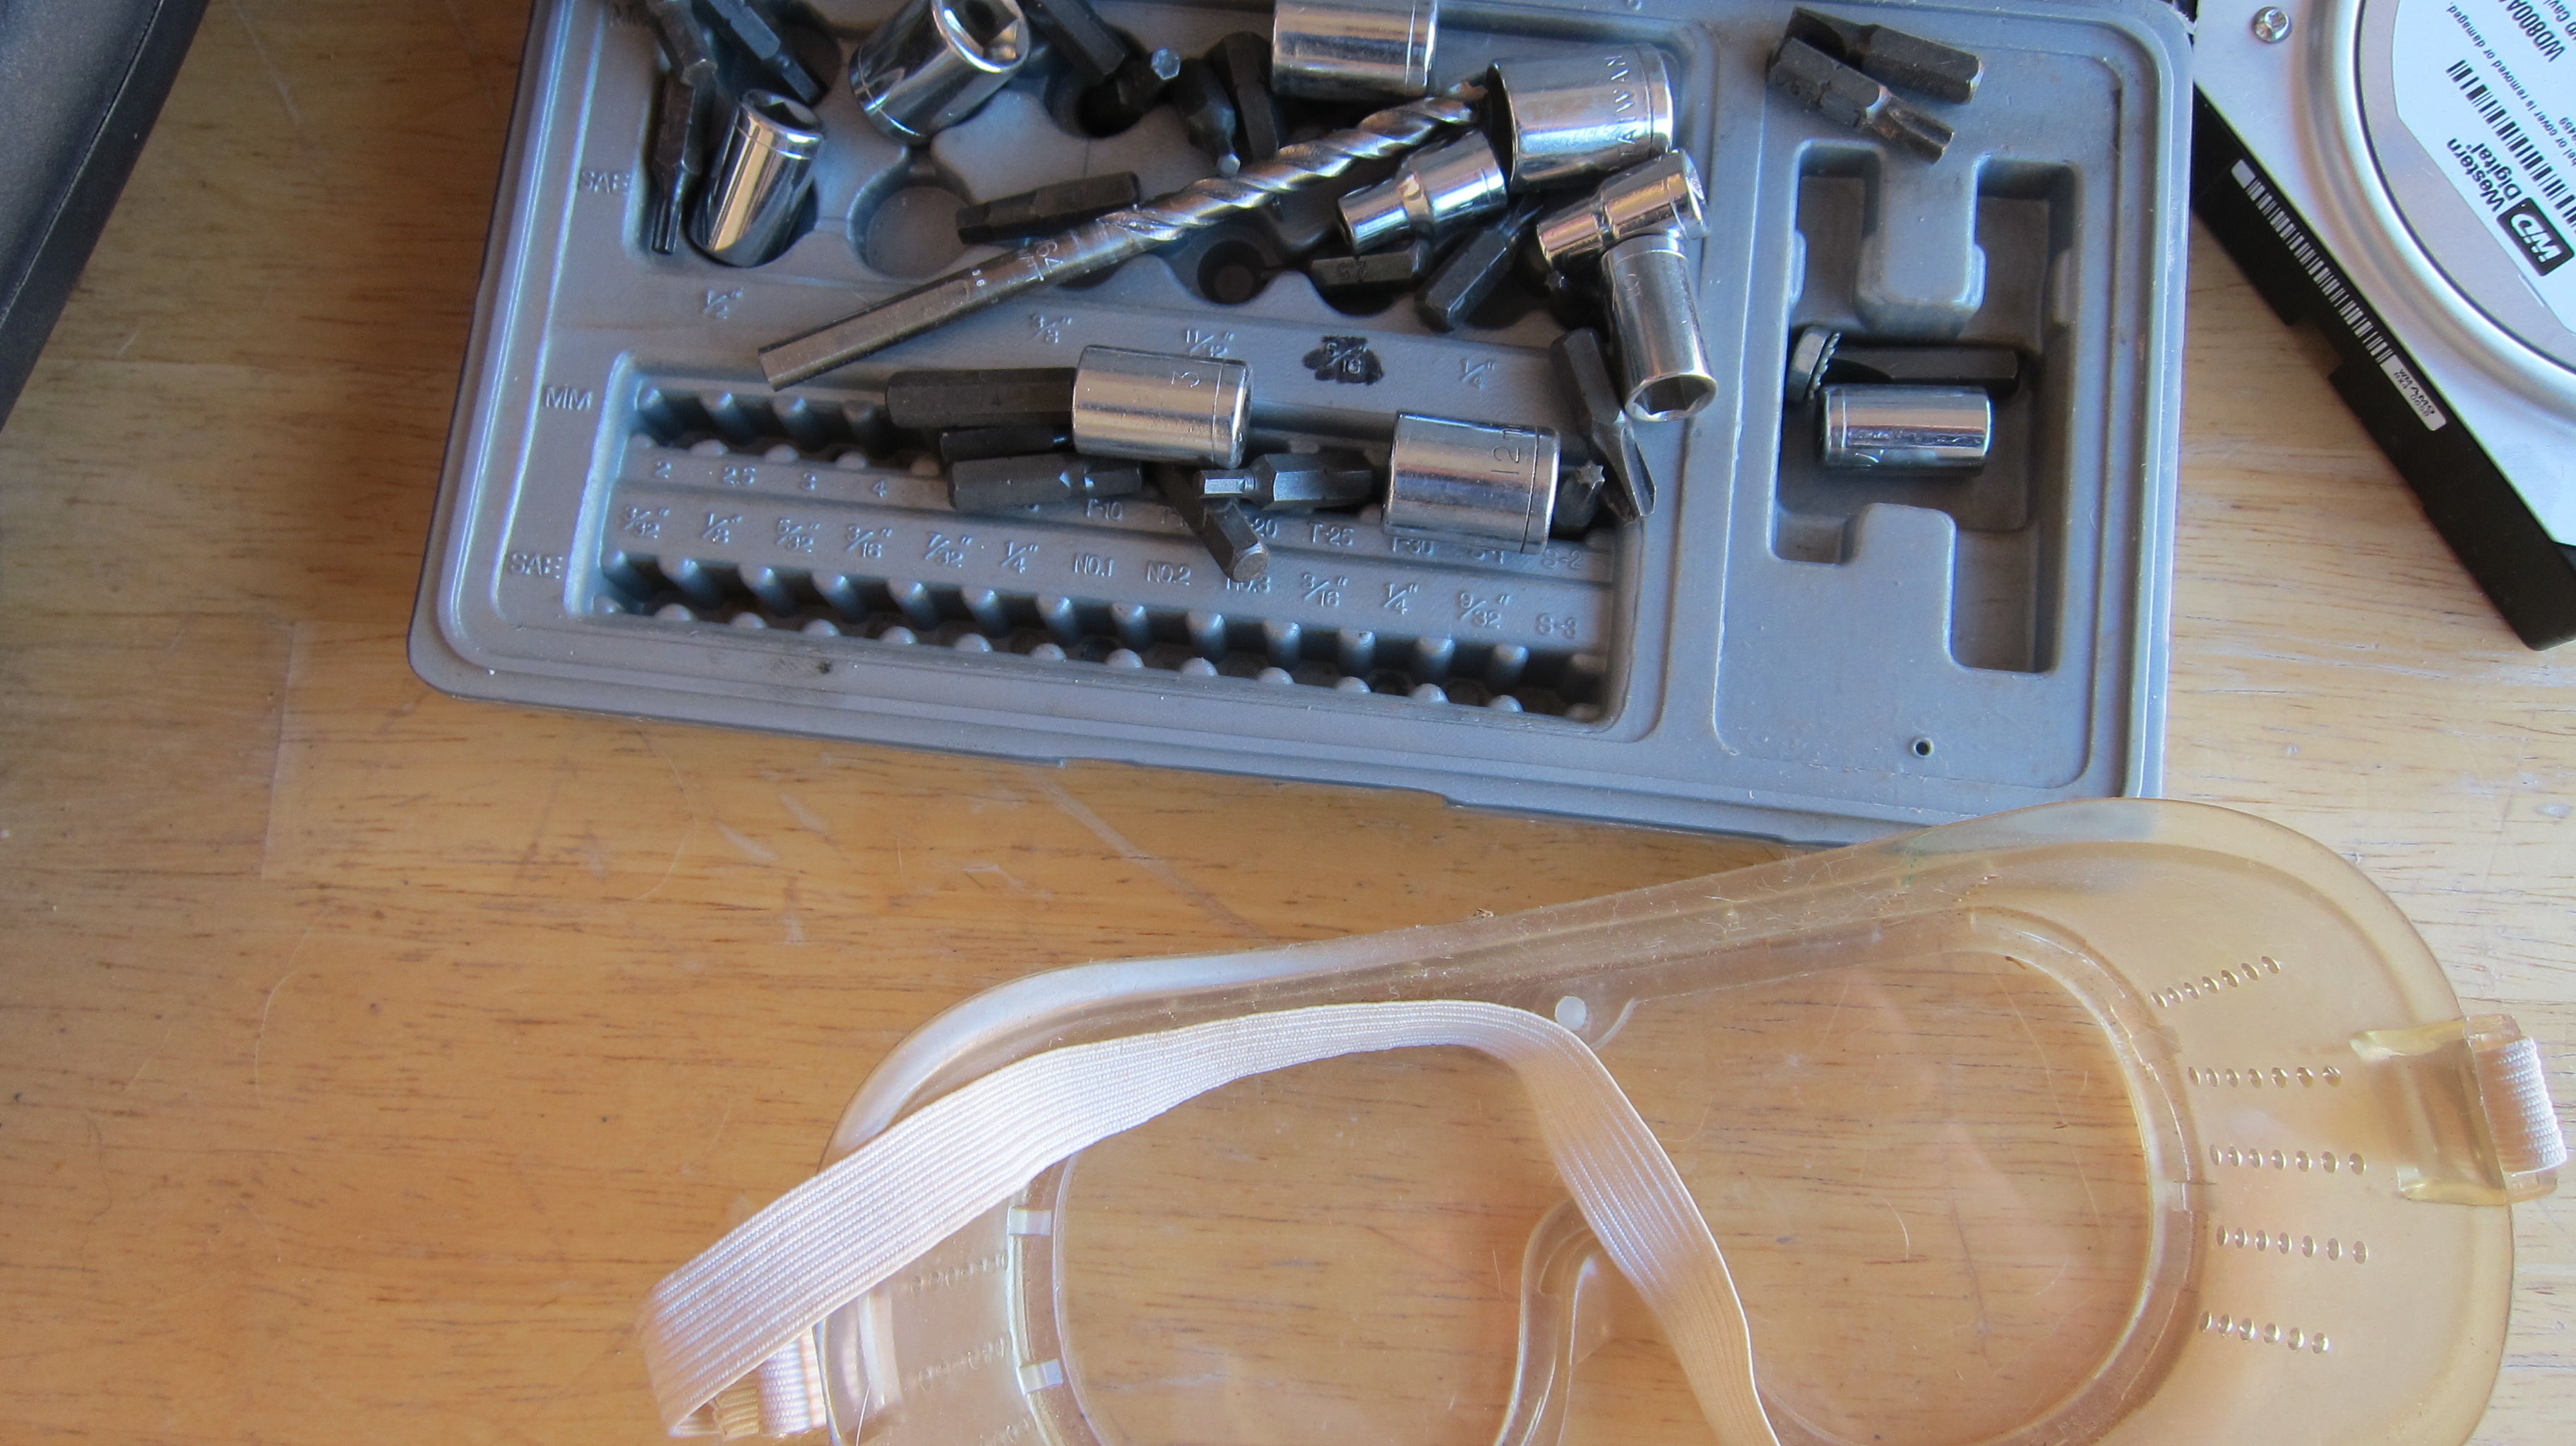
A few things you should have. Drill bits, eye protection, gloves, mouth and nose protection.
-

-
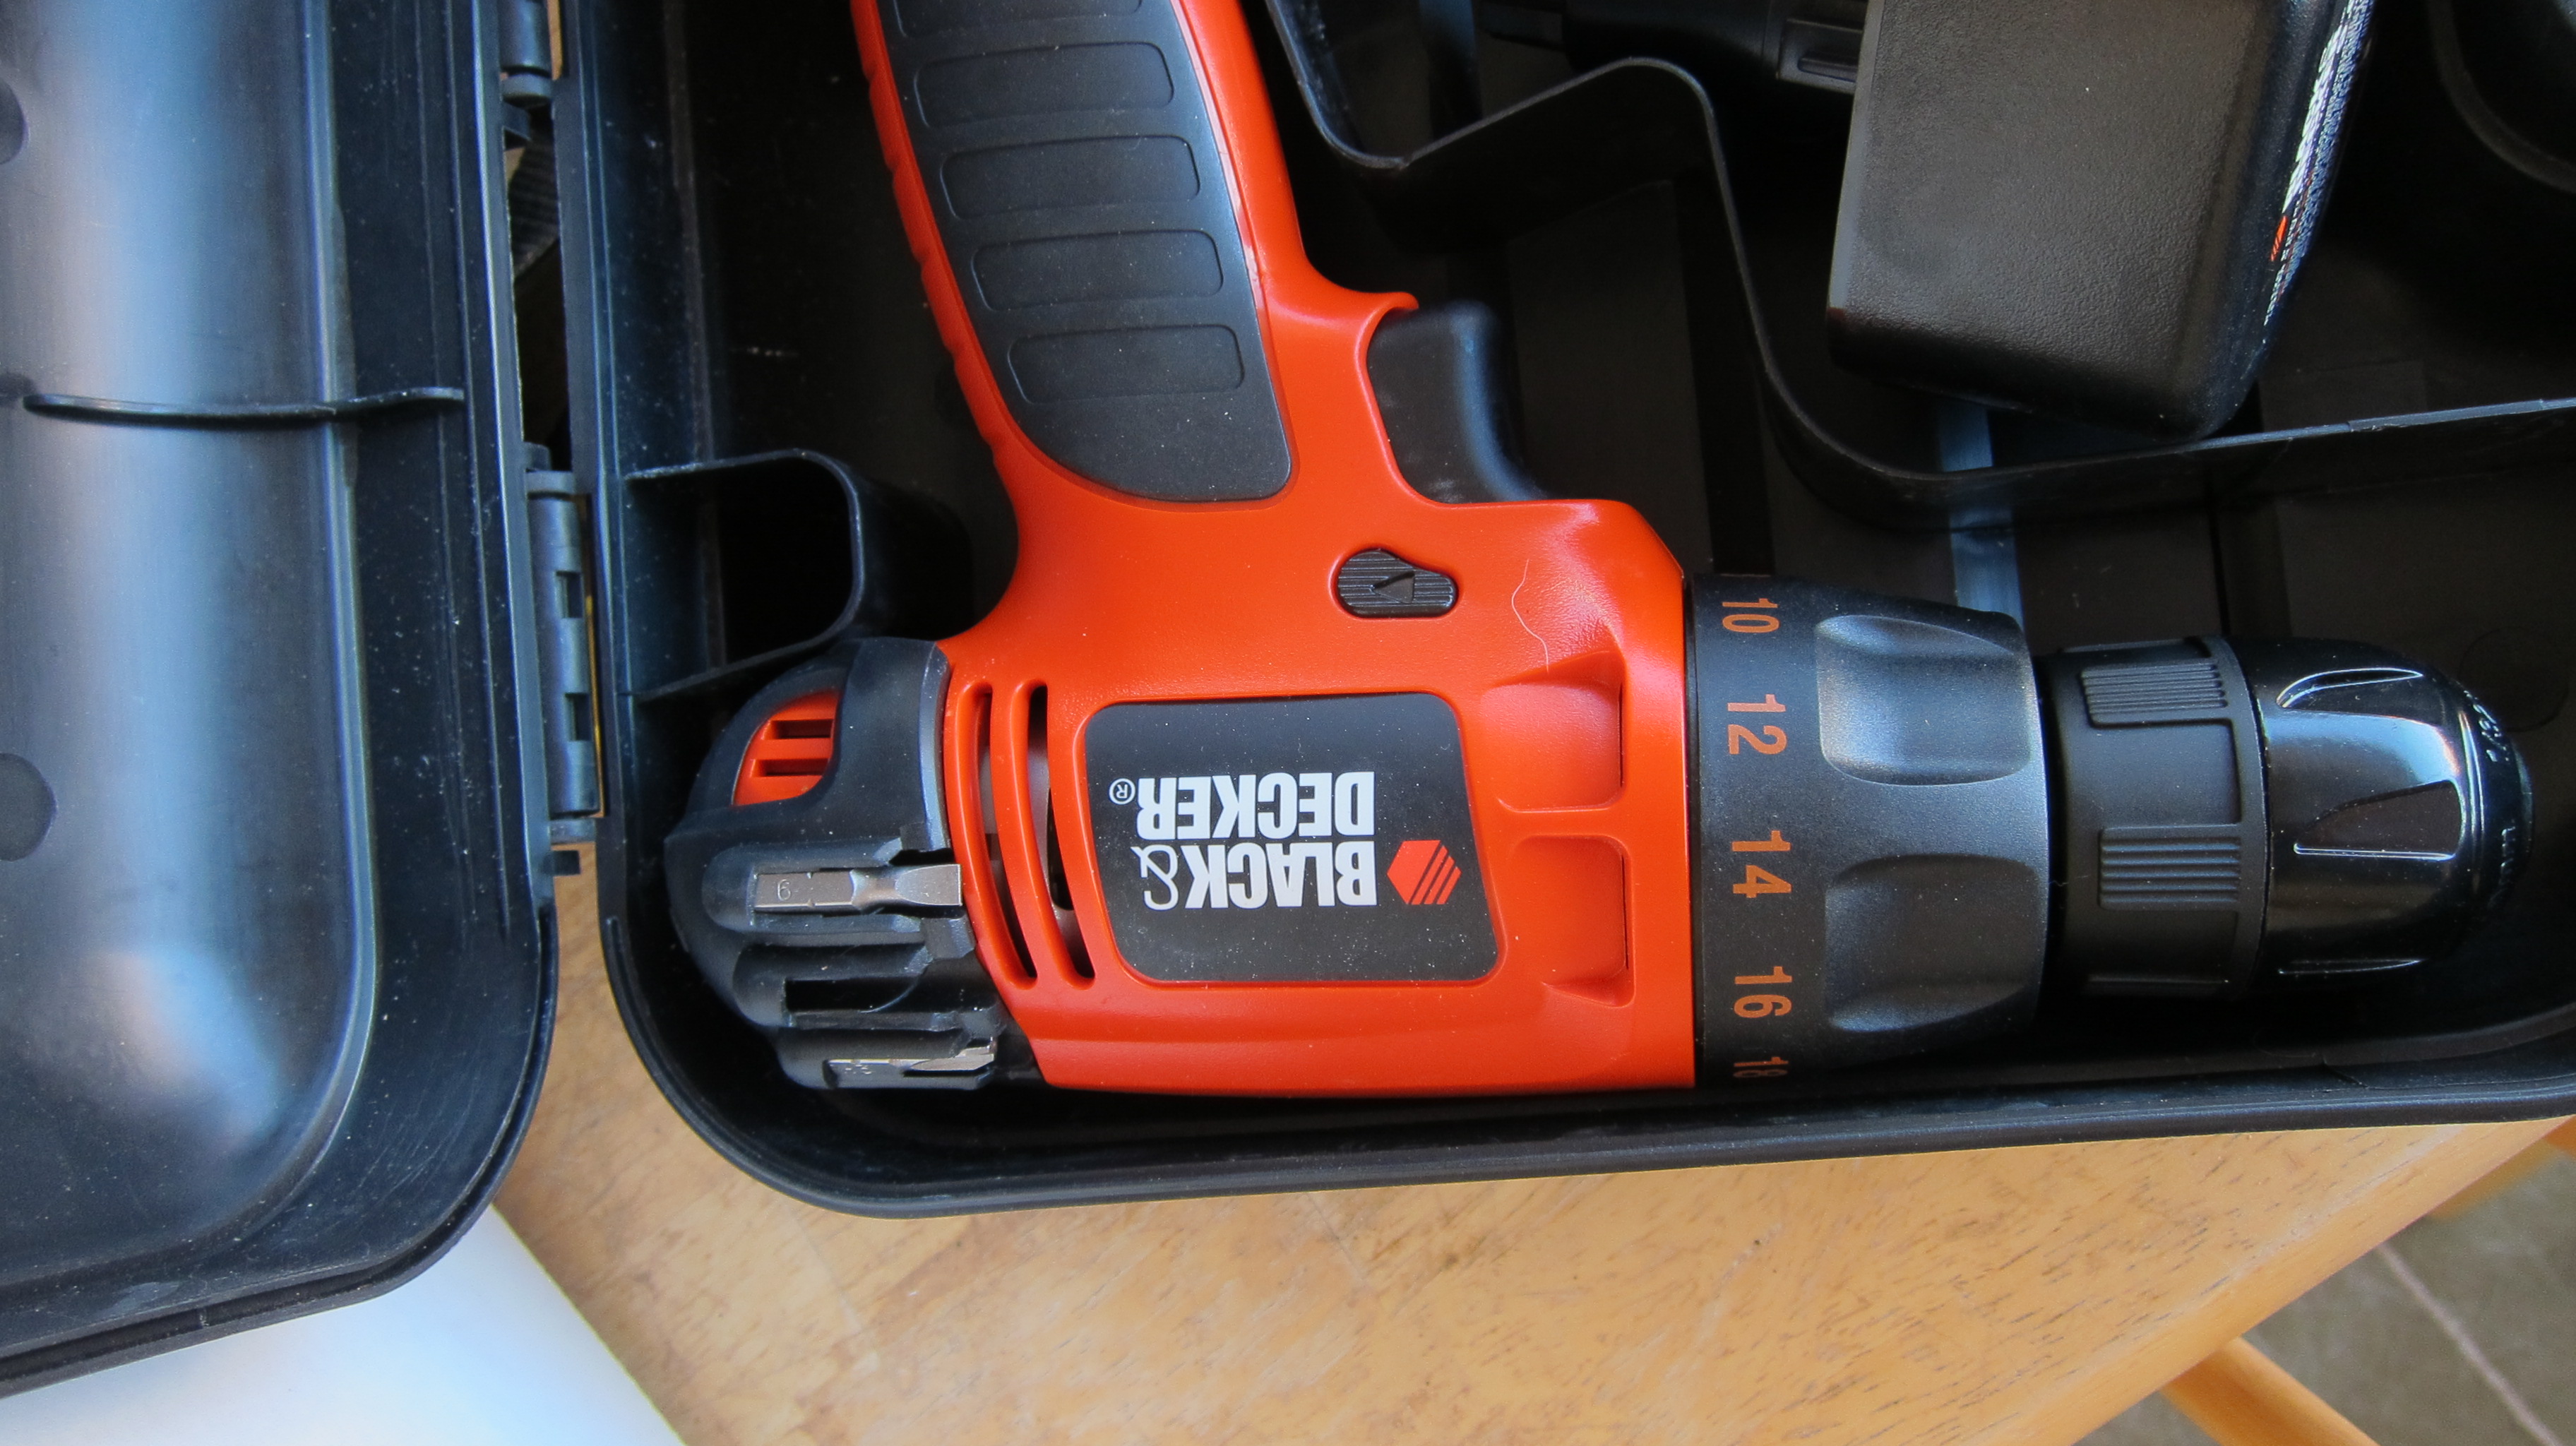
A drill
-

-
Hard drives contain many round platters inside that store the data. Drill through them.
-
-
In this example, the drive has been drilled through one side to the other. You can see the light behind it coming through.
-

-
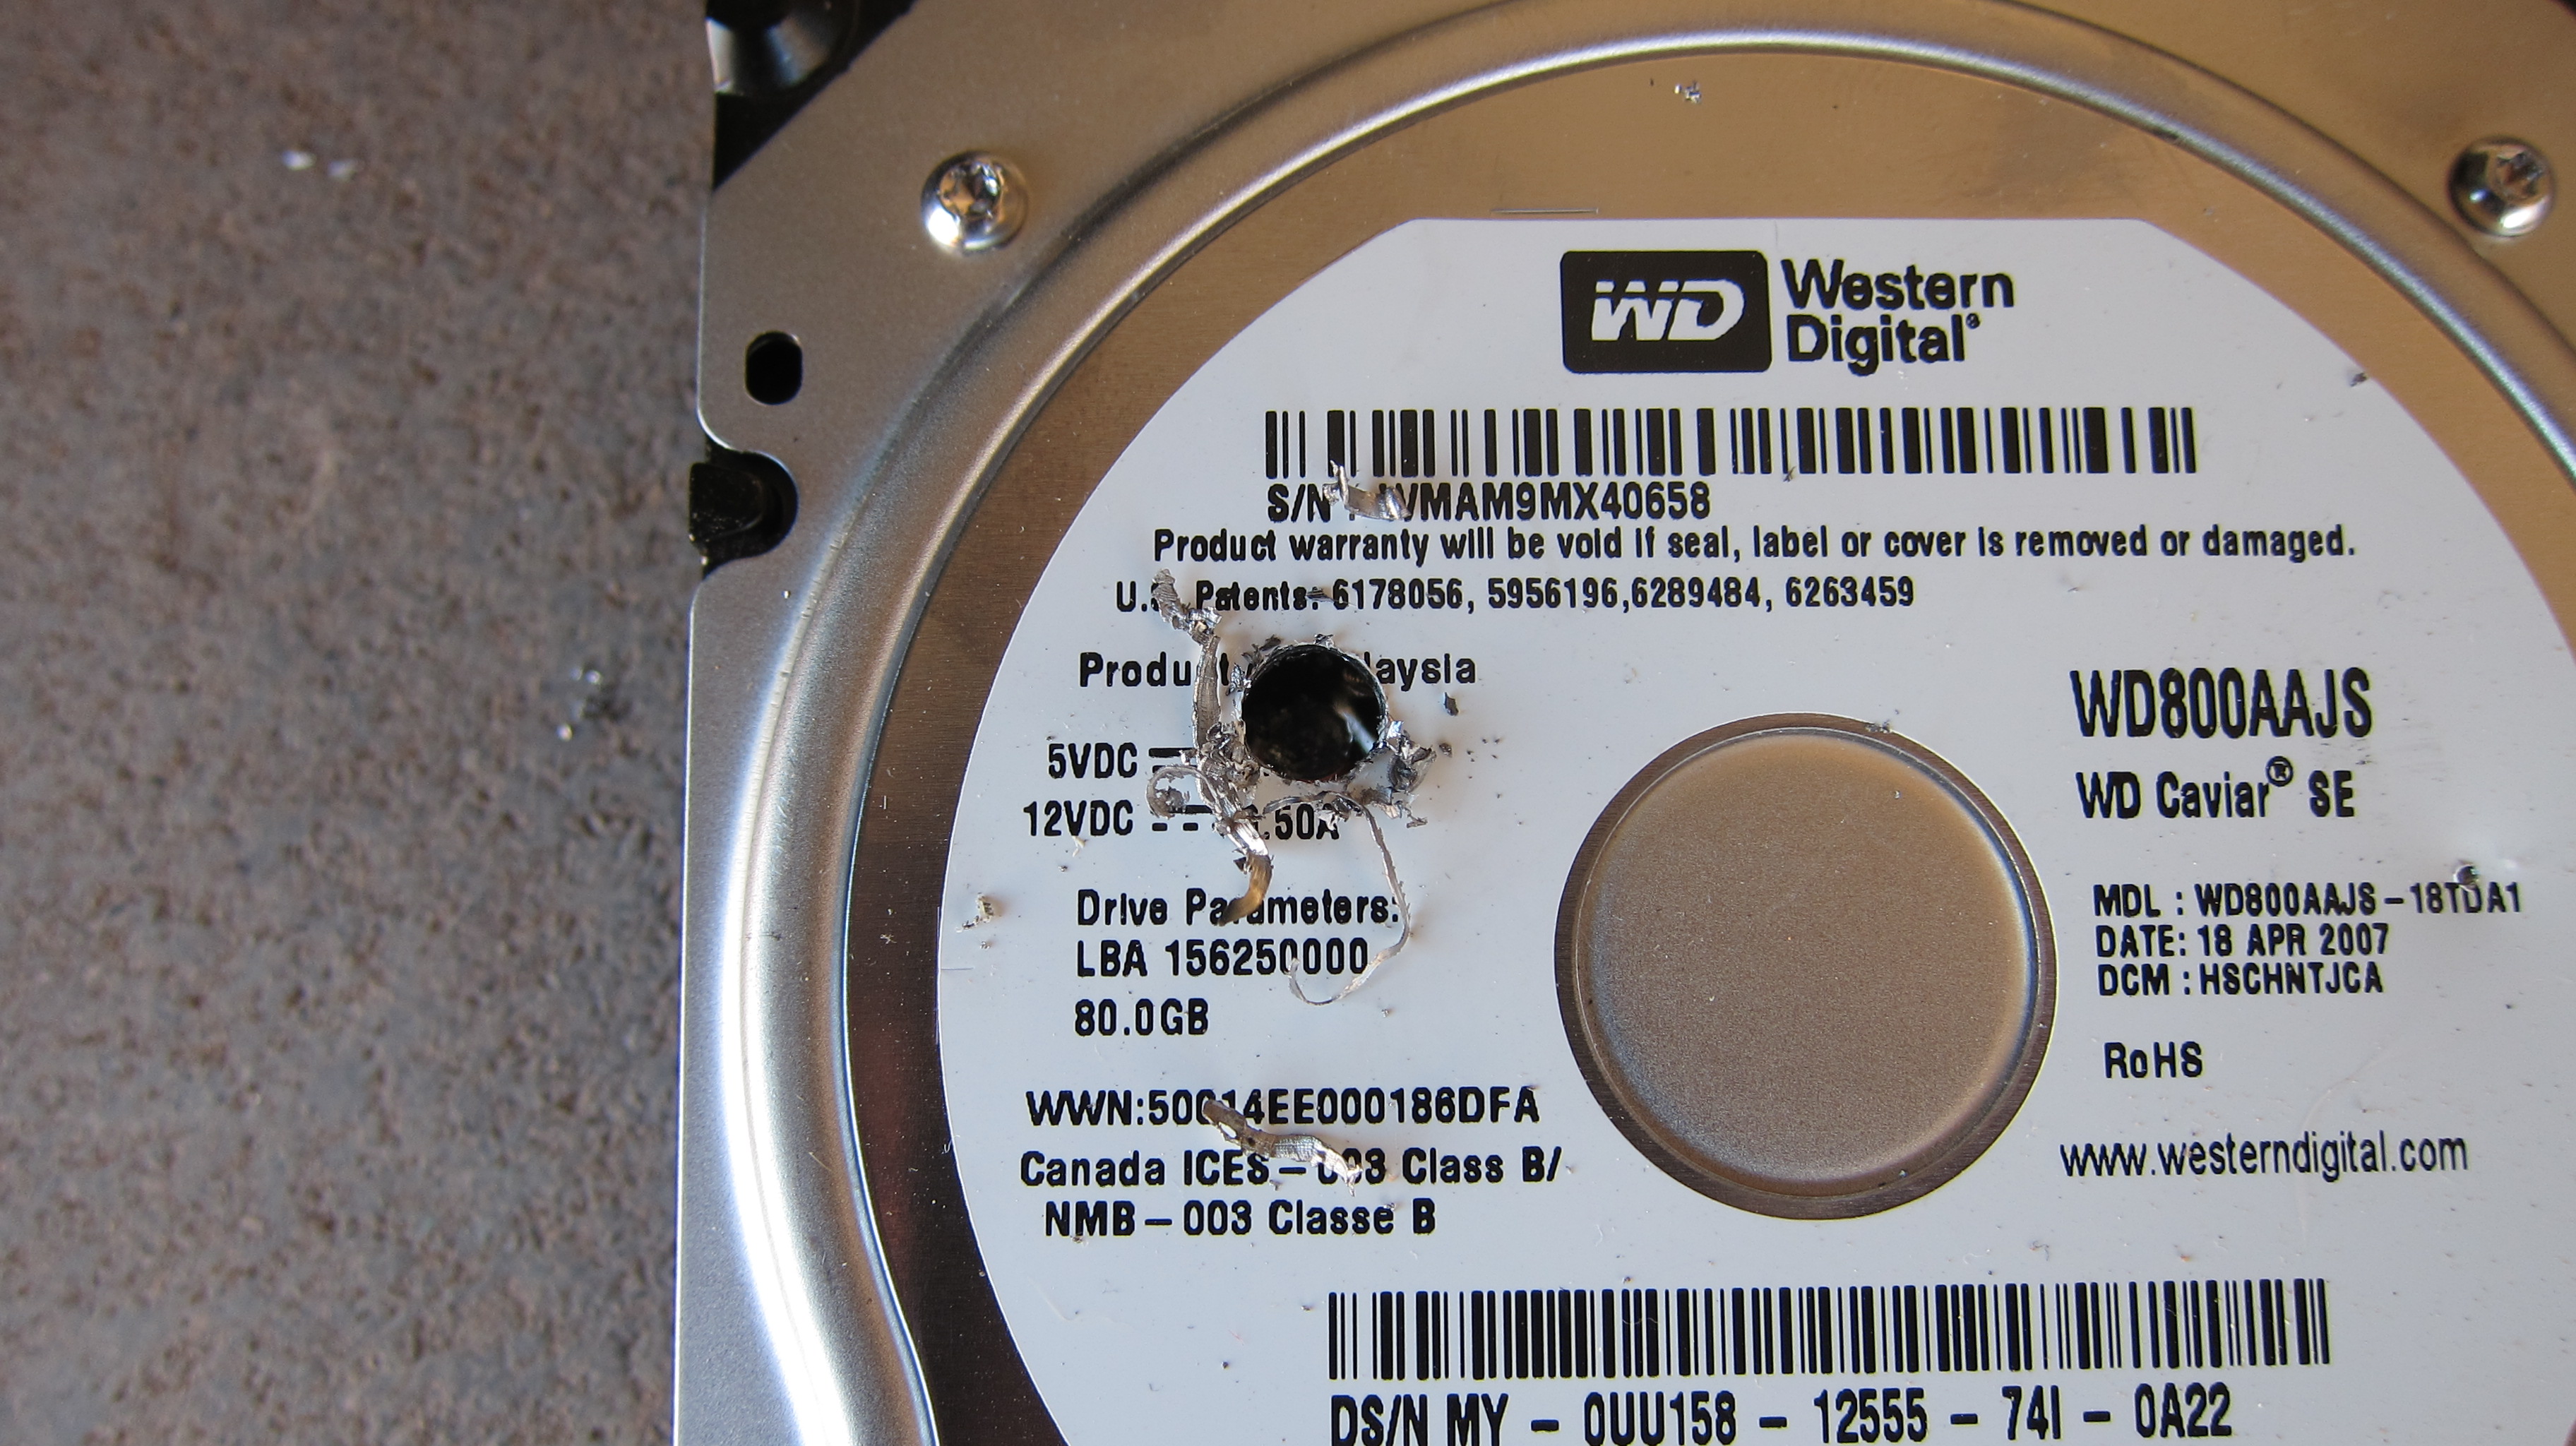
Close up of the hole drilled through the hard drive
-
-
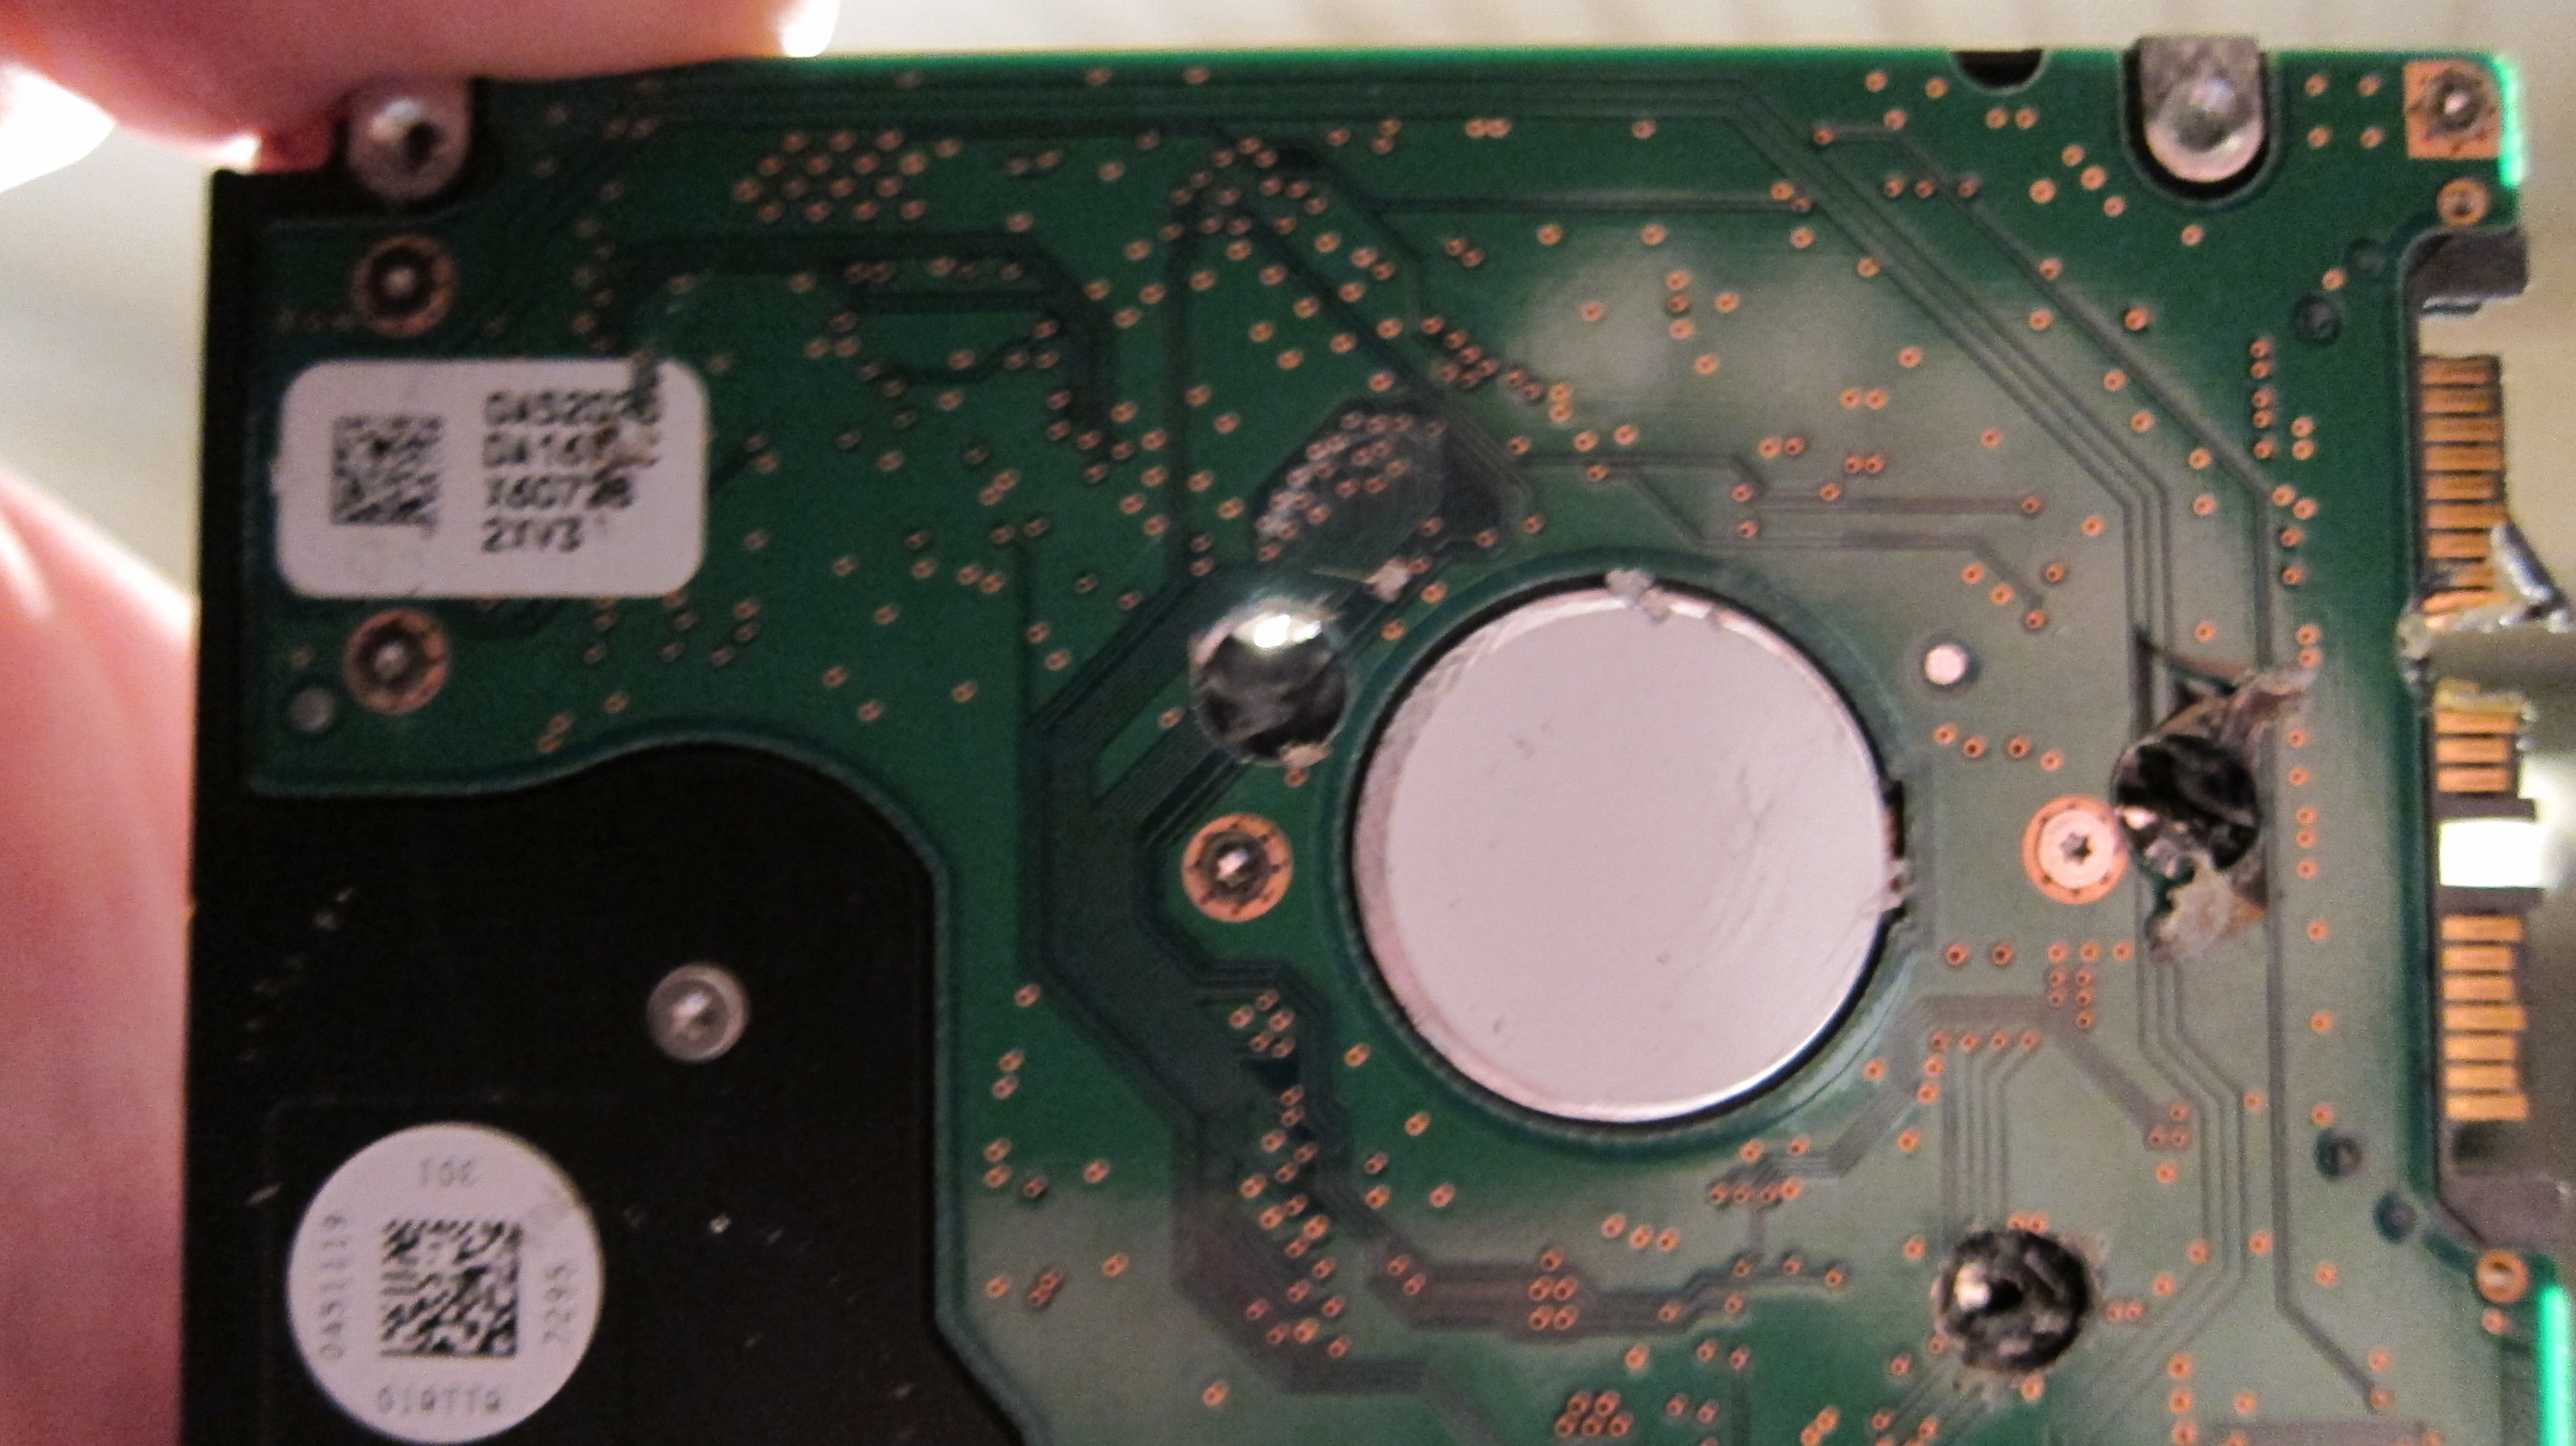
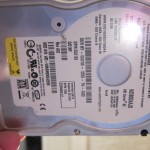
The green area is the controller board. Drill through that as well.
-
-
Don’t stop with just one hole, drill several times through the drive.
-

-
The last hard drive was a 3.5″ desktop drive. You can drill 2.5″ laptop hard drives the same way.
-
-
This laptop hard drive has a much larger controller board on the bottom, but is easier to drill through.
-
-
Multiple drill holes through a 2.5″ laptop hard drive
All done!
>> Did you like this article? Ping it!
Tags: backup, characters, cheap, computer, computer shop, controller board, copier, data, desktop, destroy, destroy the hard drive, destruction, dispose, donating, drill, easy, free, gloves, googles, hard drive, hard drive destruction, information, killdisk, laptop, low cost, mask, metal drill, method, new computer, old data, overwrite, passwords, personal data, physically destroy, platters, random, recycling, remove, secure, selling, shredding, tools, upgrading, wiping, writing
Posted in Tech Club General | No Comments »
Saturday, August 13th, 2011
I recently needed to find a mobile internet solution with a good amount of bandwidth, support for a lot of users, and one that I could easily move from place to place. The most obvious solution was a 4G internet plan, but after several frustrating hours searching around on the internet one evening for a solution I came up empty handed.
I needed something that would handle 20+ clients connected simultaneously. Yet, as some of you already know, the web stores for Sprint, Verizon, etc. only sell mobile hotspot devices with their 4G plans that handle a maximum of 5 connected clients. This small number of users makes it very difficult to use the 4G device with a small room full of people, or in a small to medium sized office as a backup device for the main internet connection if it ever goes down. Verizon had the largest capacity mobile hotspot (it would connect 8 users at the same time), but even that number was too small for my needs.
The next day I stumbled upon the Cradlepoint 4G routers. It wasn’t easy to find this company through my normal search terms the night before, so they should consider an upgrade in SEO for their website! Cradlepoint sells routers and devices that greatly expand the number of clients that can connect to and use a single 3G or 4G modem. What I liked the most about their website was how easy it was to identify the product that I needed.
First of all, they have a chart the shows you exactly how many clients or users you can connect for each of their various devices. Next, on the product pages, there are technical specs that will give you a list of the hardware (modems, hotspots, phones, etc) supported broken down by cellular company.
 I settled on the CTR 500 for my intended usage. This device has good reviews on the internet, can utilize most wireless devices from all carriers, and will support up to 32 wireless clients (and many more wired). I found this smoking deal on Newegg for the Cradlepoint, along with a lot of great reviews: http://www.newegg.com/Product/Product.aspx?Item=N82E16875997455 I settled on the CTR 500 for my intended usage. This device has good reviews on the internet, can utilize most wireless devices from all carriers, and will support up to 32 wireless clients (and many more wired). I found this smoking deal on Newegg for the Cradlepoint, along with a lot of great reviews: http://www.newegg.com/Product/Product.aspx?Item=N82E16875997455
Once I knew which Cradlepoint model I needed to buy, I then used the supported devices list on the CTR 500 webpage to look at different carriers and see what was available (AT&T, Sprint, Verizon). You will find that many products listed on the Cradlepoint product page are older devices no longer being offered by the various carriers. I had to cross-reference the devices supported by the Cradlepoint with those that were actively being sold by the cell companies.
I knew that I needed 4G, so the most important thing I had to do was look over the 4G coverage maps for the cellular companies in my area. Take a look at these 4G Coverage Maps:
Verizon 4G Coverage Map
Clear 4G Coverage Map
T-Mobile 4G Coverage Map
Sprint 4G Coverage Map
AT&T 4G Coverage Map
Unfortunately, Verizon is the only cell company in my area that offers reliable 4G coverage. That alone finalized my decision and forced me to go with Verizon and to choose a compatible Verizon device for my Cradlepoint. I say unfortunately because Verizon recently stopped selling unlimited data plans, opting instead to limit their data plans to a maximum cap of either 5G or 10G per month. If you go over that purchased limit, they will charge you an additional $10 per GB. AT&T does the same thing, limits your data plans and charges you for overages. T-Mobile claims to offer unlimited data, but that’s simply not true – they just throttle (rate limit) your bandwidth after you cross a certain amount of usage each month. Since Sprint is the only carrier that sells unlimited 3G and 4G data plans I really wanted to sign on with them, but their 4G coverage is nowhere to be found in my area. If you have Sprint in your area and they provide 4G, jump on it!
 End result? I had to settle for a Verizon 10GB per month plan. Watching bandwidth usage on a device like this will be critical when you have multiple users connected. Fortunately, the CTR 500 has a lot of sophisticated controls over the network and I am still playing around, creating rules and firewalls to limit what connected users are allowed to do with the network. There are calculators out there that can help you determine the amount of data you’ll need to accommodate 32 simultaneous internet users. A 4G device with a 5GB or 10GB cap can only be in use for a short amount of time before your limitations on the plan have been reached, so this solution is best for short, mobile internet use (like seminars) or as a backup internet option when the main connection fails. End result? I had to settle for a Verizon 10GB per month plan. Watching bandwidth usage on a device like this will be critical when you have multiple users connected. Fortunately, the CTR 500 has a lot of sophisticated controls over the network and I am still playing around, creating rules and firewalls to limit what connected users are allowed to do with the network. There are calculators out there that can help you determine the amount of data you’ll need to accommodate 32 simultaneous internet users. A 4G device with a 5GB or 10GB cap can only be in use for a short amount of time before your limitations on the plan have been reached, so this solution is best for short, mobile internet use (like seminars) or as a backup internet option when the main connection fails.
So far I have been pretty happy. I did some recent speed tests with the device and found that I was getting many times greater speed than I can get on my T1 line in the office.
>> Did you like this article? Ping it!
Tags: 4G, AT&T, backup, bandwidth, carriers, chart, clear, clients, connect, connection, coverage maps, cradlepoint, hotspot, hotspots, internet, mobile, modems, move, newegg, office, people, phones, plan, product, reviews, router, same time, simultaneously, solution, sprint, users, verizon, verizona
Posted in Tech Club General | No Comments »
Thursday, June 16th, 2011
Can you remember when you last backed up the data on your computer or your server?
Most people reading this article will not have a quick answer because most people do not have an established backup plan in place. However, lack of a backup plan could turn into a real problem for you down the road. Think about what you might lose if you lost your computer in a fire or your hard drive suffered a catastrophic failure. You might lose family pictures and videos, important financial and tax information, music collections or worse. At my PC Techs we have heard and experienced many horror stories about individuals losing an entire lifetime of converted images, home videos, and financial documents. We have been contacted by business owners that have had to close their doors and stop all production because they experienced a server hard drives crash and had no reliable backup to restore it from.
If you’re scrambling to find out how to perform data backups, don’t worry. It can be very easy to produce and secure a reliable backup. First, you’ll need to purchase an external hard drive. External hard drives with USB or Firewire connections are available online, at local computer stores, and even in most large office supply stores. Western Digital and Seagate make reliable external drives to use for backup and come recommended for their reliability. If you’re uncertain as to what hard drive to purchase, it is a good idea to look at reviews and to find recommendations from others. A good resource for hardware reviews and to purchase external hard drives online is Newegg, http://www.newegg.com. Also, when you select a backup device, be sure to locate one that has enough space for all of the hard drives on your system.
Some external hard drives come bundled with backup software, but we caution you against using that software to perform a backup as most of these programs do not have an option for full partition or full disk backup. A full partition backup is critical when you need to recover from a system failure in a hurry. We recommend that you download and install a free* software tool called Easeus ToDo Backup. After installing Easeus, look for the backup option named full disk & partition backup & restore. Support and instructions on the use of Easeus Todo Backup can be found in the Support section of the site linked above. Perform a complete system backup of your entire computer, including all hard drives, to the external hard drive.
Once you’ve performed a full disk backup using Easeus, you should check that the job completed without error and confirm that you have a full and complete backup of your data. Some of those horror stories we talked about earlier were from people who presumed that everything was fine with their backup when in fact it was not. Errors and problems can occur with backup software just like anything else. Be sure to check your backups on a regular basis and ensure that they are complete. For additional data protection, consider purchasing a second external backup hard drive and using that to rotate backups. Store the second backup drive at a separate physical location from the first, to protect against theft or fire.
*Easus ToDo Backup is free for home use only. Small & medium business workstations and server versions require an additional payment.
>> Did you like this article? Ping it!
Tags: backup, data, easeus, external, hard drive, usb
Posted in my PC Techs News & Events | No Comments »
Saturday, September 18th, 2010
 We do work for several restaurants and retail stores here in Phoenix, Arizona. These shops are all using windows based point of sale systems. While the software and database that run on the computers to transact credit card payments and process menu items are highly customized and supported by the franchise in most cases, the underlying operating system and hardware is not. We do work for several restaurants and retail stores here in Phoenix, Arizona. These shops are all using windows based point of sale systems. While the software and database that run on the computers to transact credit card payments and process menu items are highly customized and supported by the franchise in most cases, the underlying operating system and hardware is not.
We have learned a lot about these systems and can say with certainty that the biggest issues we have run into are lack of proper backups and lack of spare hardware. When a point of sale system goes down for a store, especially a busy store, it is NO FUN. Employees need to process payments manually by hand and write out paper receipts. As you can imagine, the slowdown at the register does a lot to aggravate customers and employees alike. But there are three things that you can do as a retail store business owner to minimize downtime in the event of a system crash.
1. Perform regular system maintenance
Hiring a firm like my PC Techs to regularly maintain your equipment each month can save you from several hours worth of headache and hundreds or thousands of dollars in lost sales. Our technicians will visit your store and examine your systems for irregular performance. System errors, faulty hardware, failing hard drives, botched OS updates, and corrupted data can, in many cases, be identified and corrected before it becomes a larger problem. Dust can be cleaned out (the largest cause of hardware failure), and parts inspected. Unnecessary programs can be removed and system performance improved. The best part of this scenario, the repairs can be performed before or after regular hours, so customers never experience delay.
2. Perform regular, complete data backups
Usually during the same time as the system maintenance, our technicians can perform a complete data backup of all of your POS systems. This is important. When a hard drive crashes, you want to get your system back online as quickly as possible. To rebuild an entire system, restore data from on off site repository, and get all the hardware and software working correctly could take many hours. With a complete system backup, it could be as simple as popping in the right piece of replacement hardware and running a 30 minute recovery.
3. Identify and build an inventory of replacement parts
When a system failure happens, recovery time can be improved considerably when the right spare parts are kept on hand. Rather than buying hard to find computer equipment online, and waiting for it to be shipped, a replacement part can be obtained from storage and quickly installed to replace the broken component. That part can later be replaced to storage, so you always have a backup on hand for the next time disaster strikes.
When you think about the security of your data and your ability to transact business, keep in mind your local computer experts and ways that they can work with you to help improve the reliability of your computer operations. For help with the maintenance and emergency support of your POS systems, contact my PC Techs today. (602) 456-0150.
Tags: Arizona, backup, backups, based, business, business owner, buying, cleaned, clients, computer, computer equipment, computer experts, computers, corrupted, credit card, customers, data, data backup, database, delay, disaster, dollars, downtime, dust, employees, equipment, errors, failure, faulty, franchise, goes down, hard drive, hard drives, hard to find, hardware, headache, hours, improve, improved, inspected, issues, maintain, maintenance, menu items, minimize, month, my pc techs, online, operating system, operations, OS, parts, payments, PC, performance, phoenix, point of sale, pos, problem, process, programs, projects, rebuild, receipts, recovery, register, reliability, removed, replacement, replacement part, restaurants, restore, retail, retail tores, sales, security, shipped, software, spare, storage, store, system, system crash, system maintenance, systems, technicians, transact, windows
Posted in Tech Club General | No Comments »
WE WORK HARD FOR YOU, BUT DON'T JUST TAKE OUR WORD FOR IT!
We've helped over 1,000 satisfied businesses throughout the Phoenix valley, click here to view some of their testimonials:

©2010 my PC Techs is owned and operated by Leo Polus, L.L.C., concept by Andre Morris |
| |
 456-0150")